
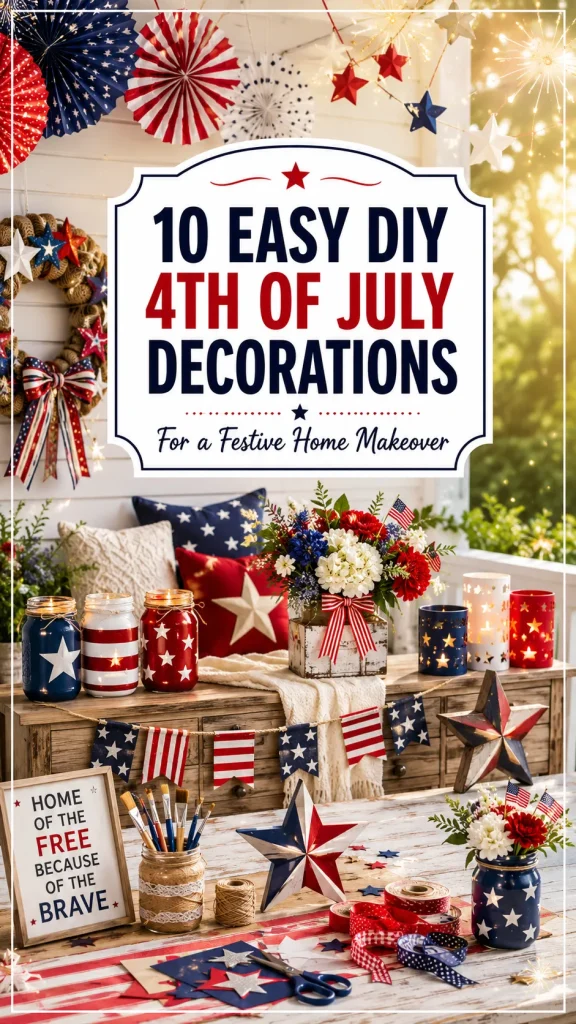
The Fourth of July is more than an opportunity to watch fireworks, enjoy grilled food, and spend time with family. It is also the perfect occasion to fill your home with cheerful red, white, and blue details that celebrate summer and American independence.
Unfortunately, seasonal decorations can become expensive—especially when you are decorating several rooms, hosting a backyard barbecue, or preparing your porch for guests. Store-bought pieces may also look identical to decorations found in every other home.
That is where easy DIY 4th of July decorations make a difference.
With inexpensive materials such as mason jars, fabric scraps, paper, paint, ribbon, and recycled containers, you can create patriotic decorations that feel personal, stylish, and surprisingly polished. Many of these projects can be completed in less than an hour, making them suitable for busy parents, beginner crafters, party hosts, and anyone decorating at the last minute.
This guide features ten creative Fourth of July projects for indoor and outdoor spaces. Each idea includes practical instructions, styling suggestions, benefits, and advice about where it works best.
Whether your decorating style is rustic farmhouse, modern, playful, minimalist, or traditional, you will find an idea that can be customized for your home.
Quick Comparison of the Best DIY 4th of July Decorations
Use this table to choose a project based on your available time, crafting experience, and desired display area.
| Decoration Idea | Estimated Time | Difficulty | Maintenance | Best Location |
|---|---|---|---|---|
| Patriotic Mason Jar Centerpieces | 35–45 minutes | Easy | Low | Dining table or mantel |
| No-Sew Fabric Flag Garland | 30–40 minutes | Easy | Low | Porch, fireplace, or wall |
| Red, White, and Blue Door Wreath | 45–60 minutes | Moderate | Low | Front door |
| Painted Lawn Stars | 20–30 minutes | Easy | Temporary | Front yard or pathway |
| Patriotic Tin Can Lanterns | 45–60 minutes | Moderate | Low | Patio or outdoor table |
| Paper Firework Bursts | 25–35 minutes | Easy | Very low | Party table or wall |
| Bandana Table Runner | 20–30 minutes | Easy | Low | Dining or picnic table |
| Star-Spangled Throw Pillows | 40–60 minutes | Moderate | Low | Sofa, porch swing, or chairs |
| Patriotic Wooden Sign | 60–90 minutes | Moderate | Very low | Entryway or porch |
| Red, White, and Blue Floral Display | 15–25 minutes | Very easy | Medium | Kitchen island or table |
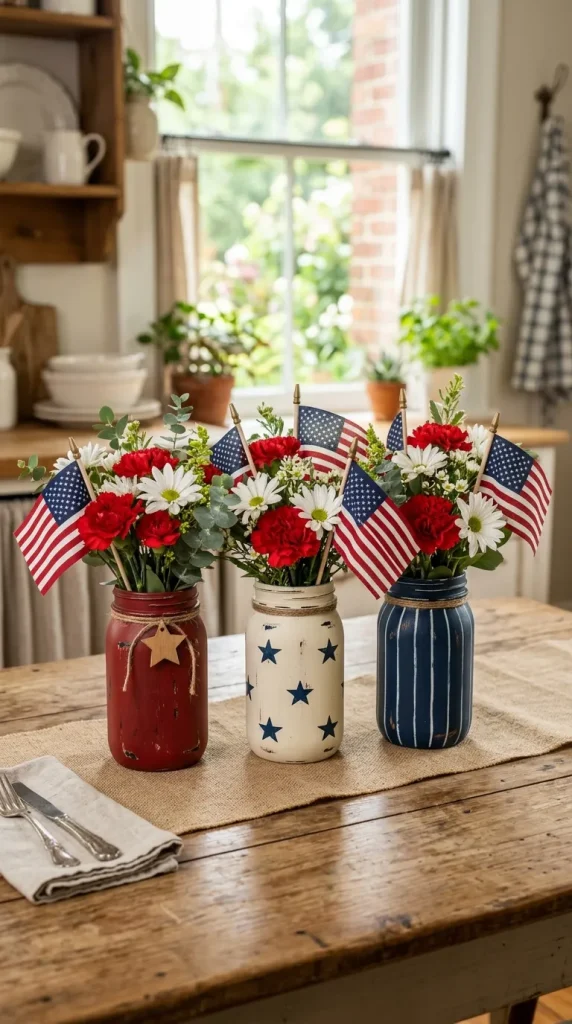
1. Patriotic Mason Jar Centerpieces
Mason jars are affordable, versatile, and ideal for creating charming seasonal decorations. A set of painted jars can instantly transform an ordinary table into a festive Fourth of July display.
Paint one jar red, another white, and the third blue. Add stars, stripes, twine, miniature flags, or rustic ribbon to personalize the arrangement. The completed jars can hold flowers, utensils, paper straws, battery-operated candles, or small American flags.
Materials You Will Need
- Three clean mason jars
- Red, white, and blue acrylic or chalk paint
- Paintbrushes or foam brushes
- Star stencils or star stickers
- Painter’s tape
- Twine, ribbon, or raffia
- Optional artificial flowers or flags
How to Make It
Clean and dry the jars thoroughly so the paint adheres properly. Apply two thin coats of paint, allowing each coat to dry before adding the next.
For a striped design, place painter’s tape around the jar before painting. For stars, apply removable star stickers, paint over them, and peel them away when the surface is nearly dry.
Lightly sand small areas after the paint dries to create a farmhouse-style distressed finish.
Who It Suits Best
This project is ideal for beginner crafters, farmhouse decor lovers, party hosts, and families who want an activity that older children can help complete.
Decorating Tips
Group the jars on a wooden tray to make the arrangement feel intentional. Add white daisies, red carnations, and blue-tinted artificial flowers for a complete patriotic centerpiece.
For evening events, place battery-operated fairy lights inside the jars. Avoid using an open flame in painted or decorated containers.
Benefits
- Uses inexpensive, reusable materials
- Works as both decoration and storage
- Can be customized for rustic, modern, or playful interiors
- Easy to store and reuse next year
2. No-Sew Red, White, and Blue Fabric Flag Garland
A fabric garland adds color and movement without requiring advanced sewing skills. It can be hung above a fireplace, across a porch railing, behind a food table, or along a blank wall.
Instead of stitching fabric pieces together, tie strips of fabric directly onto rope or twine. This creates a relaxed, textured look that works especially well for farmhouse, cottage, and outdoor party decor.
Materials You Will Need
- Red, white, and blue fabric scraps
- Patriotic printed fabric or bandanas
- Scissors
- Jute rope, ribbon, or strong twine
- Measuring tape
How to Make It
Cut the fabric into strips approximately one to two inches wide and 12 to 18 inches long. The edges do not need to be perfect because slightly frayed fabric gives the garland character.
Measure the area where the garland will hang, then cut the rope with extra length at both ends. Fold each strip in half, place the folded section behind the rope, and pull the loose ends through the loop.
Alternate solid colors and printed fabrics until the rope is full.
Who It Suits Best
This decoration suits people who do not own a sewing machine, crafters using leftover fabric, families decorating on a budget, and hosts who need a large statement piece.
Decorating Tips
Vary the fabric lengths for a fuller, more relaxed appearance. Combine stripes, stars, gingham, denim, and solid fabric rather than using only three plain colors.
For a more elegant display, replace torn fabric strips with satin, velvet, lace, and grosgrain ribbon.
Benefits
- Requires no sewing
- Covers a large space inexpensively
- Can be reused indoors or outdoors
- Helps repurpose leftover fabric and old clothing

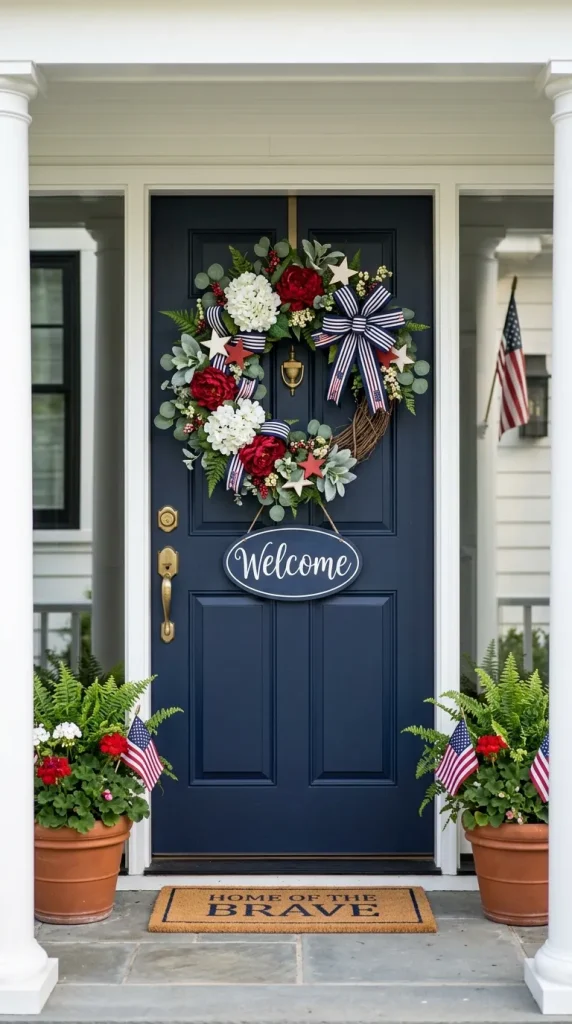
3. Red, White, and Blue Door Wreath
Your front door is one of the first things guests see, so a patriotic wreath is an effective way to create a festive welcome.
You can make a wreath using ribbon, mesh, fabric, wooden stars, faux flowers, miniature flags, or painted clothespins. A simple grapevine base is especially useful because decorations can be attached and removed without permanently changing the wreath.
Materials You Will Need
- Grapevine, foam, or wire wreath form
- Red, white, and blue ribbon
- Faux flowers or greenery
- Wooden stars
- Floral wire or a hot glue gun
- Decorative sign or miniature flag
How to Make It
Begin by deciding whether you want a symmetrical design or an asymmetrical floral arrangement. Wrap ribbon around part or all of the wreath form, securing it at the back.
Arrange flowers, stars, bows, and greenery before attaching them. This allows you to adjust the placement and avoid an unbalanced design.
Use floral wire for heavier objects and hot glue for lightweight accents.
Who It Suits Best
This project works well for homeowners, apartment residents with covered doors, intermediate crafters, and anyone who wants one highly visible seasonal decoration.
Decorating Tips
Limit the design to one focal area if you prefer a sophisticated appearance. For example, place a large striped bow at the bottom and arrange white flowers and blue stars around it.
Apply an outdoor-safe sealant to painted wooden pieces when the wreath will be exposed to humidity or occasional rain.
Benefits
- Creates immediate curb appeal
- Can be customized to complement your door color
- Reusable with proper storage
- Makes a strong decorative impact without decorating the entire porch
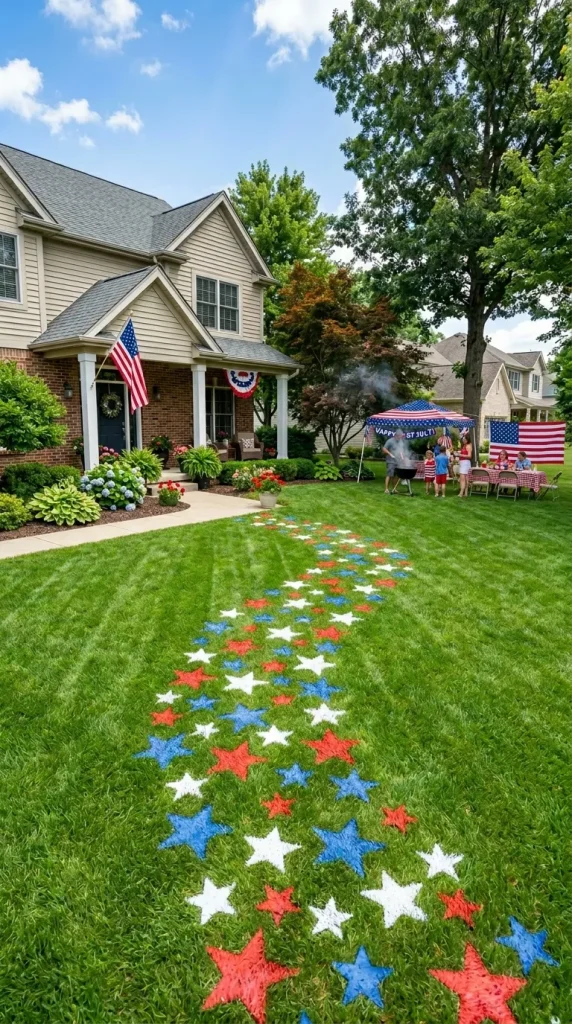
4. Temporary Painted Stars on the Lawn
Painted lawn stars are one of the most exciting outdoor DIY patriotic decorations, especially when you are hosting a backyard celebration.
The stars appear bold in photographs, help define walkways, and create a festive first impression. The key is to use grass-safe marking paint rather than standard spray paint.
Materials You Will Need
- Large cardboard sheets
- Craft knife or scissors
- Printed star template
- Grass-safe temporary marking spray
- Measuring tape
- Protective gloves
How to Make It
Draw or trace a large star onto cardboard and carefully cut out the center to create a stencil.
Place the stencil flat on dry grass. Apply a light, even layer of temporary marking spray, holding the can according to the manufacturer’s instructions. Lift the stencil carefully and repeat the process along the walkway or lawn.
Who It Suits Best
This idea is best for outdoor party hosts, families with large yards, community events, and homeowners seeking a dramatic decoration that does not require permanent installation.
Decorating Tips
Create alternating red, white, and blue stars along a pathway. You can also arrange the stars in a circle around a picnic area or outdoor game station.
Test the marking spray on a small, hidden area of grass first. Confirm that the product is intended for temporary landscape marking and follow all safety directions.
Benefits
- Produces a large visual effect quickly
- Does not require storage after the event
- Helps guide guests through outdoor spaces
- Looks impressive in party photographs
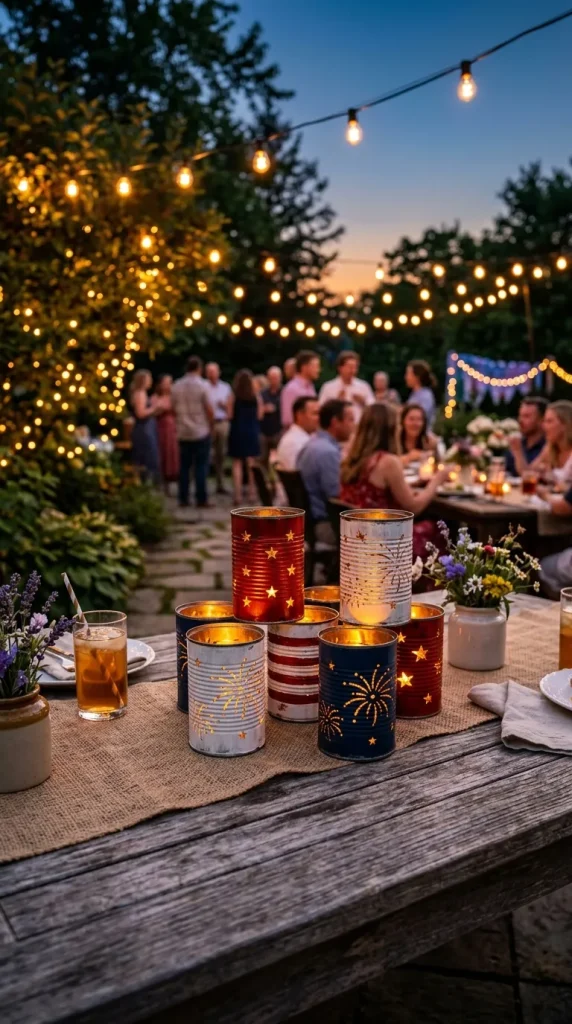
5. Patriotic Tin Can Lanterns
Empty food cans can become beautiful perforated lanterns with a little paint and careful preparation. When illuminated with battery-powered candles, the punched designs cast decorative patterns across outdoor tables.
This project is an excellent example of turning everyday recyclable materials into useful Fourth of July home decor.
Materials You Will Need
- Clean metal cans with labels removed
- Water and freezer access
- Hammer and large nail
- Permanent marker
- Red, white, and blue spray paint
- Battery-operated tea lights
- Protective gloves and safety glasses
How to Make It
Fill each can with water and freeze it completely. The ice supports the metal and helps prevent the can from collapsing while you create holes.
Draw stars, stripes, or simple firework patterns on the can with a marker. Place the frozen can on a stable, protected surface and carefully punch holes along the design using a nail and hammer.
Allow the ice to melt, dry the can thoroughly, smooth any sharp areas, and apply paint. Once dry, insert a battery-operated candle.
Who It Suits Best
Tin can lanterns are suitable for eco-conscious crafters, adults who enjoy upcycling, and hosts planning evening patio dinners.
Because the project involves sharp metal and tools, children should only participate under close adult supervision.
Decorating Tips
Create cans in different heights and group them in odd numbers. Place them on a tray with small flags or flowers to form an outdoor centerpiece.
Use battery-operated lights instead of real candles, especially around children, pets, fabric tablecloths, or dry outdoor areas.
Benefits
- Reuses household materials
- Provides decorative evening lighting
- Can be customized with many punched patterns
- Adds handmade character to a patio or porch
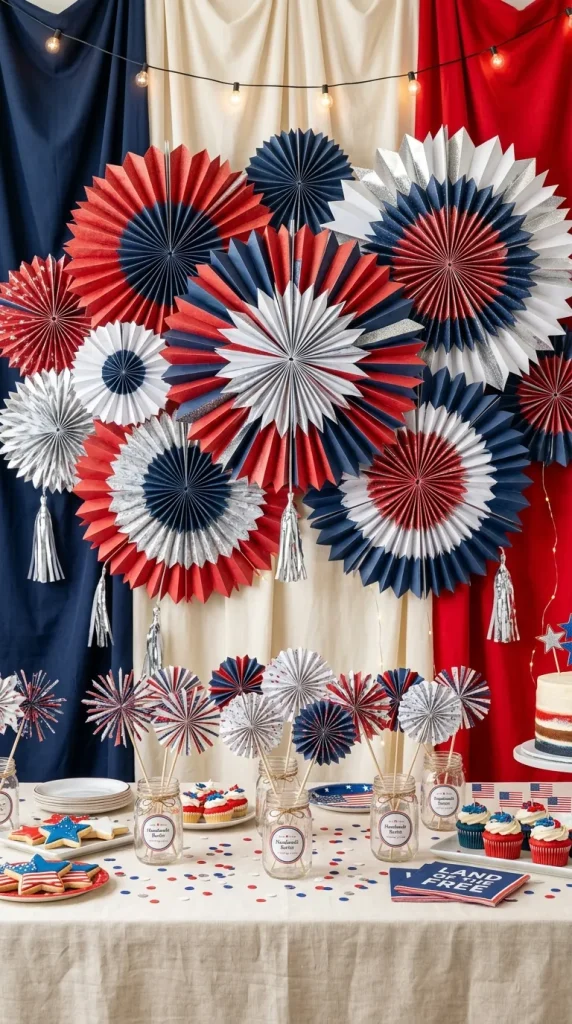
6. Paper Firework Bursts
Paper firework bursts bring the excitement of fireworks indoors without noise, smoke, or safety concerns. These decorations resemble colorful explosions and can be displayed on walls, party tables, shelves, or photo backdrops.
They are among the easiest homemade Independence Day decorations because they require only basic paper-crafting supplies.
Materials You Will Need
- Red, white, blue, silver, or glitter cardstock
- Scissors or paper cutter
- Glue or double-sided tape
- Wooden skewers or paper straws
- Small jars, boxes, or foam blocks
- Optional metallic fringe
How to Make It
Cut narrow paper strips in several lengths. Fold, curl, or accordion-pleat the strips before attaching their ends at a central point.
Layer several pieces to form a three-dimensional burst. Glue the finished firework onto a paper straw or wooden skewer and place it in a jar or foam-filled container.
For wall decorations, create flatter bursts and secure them with removable adhesive strips.
Who It Suits Best
This craft is ideal for families, classroom activities, beginner crafters, and people decorating small apartments or rental homes.
Decorating Tips
Use several shades of blue and red instead of one shade of each color. Metallic silver paper reflects light and makes the display feel more celebratory.
Create bursts in three different sizes and overlap them on a wall for a professional photo backdrop.
Benefits
- Lightweight and inexpensive
- Safe for indoor spaces
- Easy to customize by size and color
- Excellent for dessert tables and photography areas
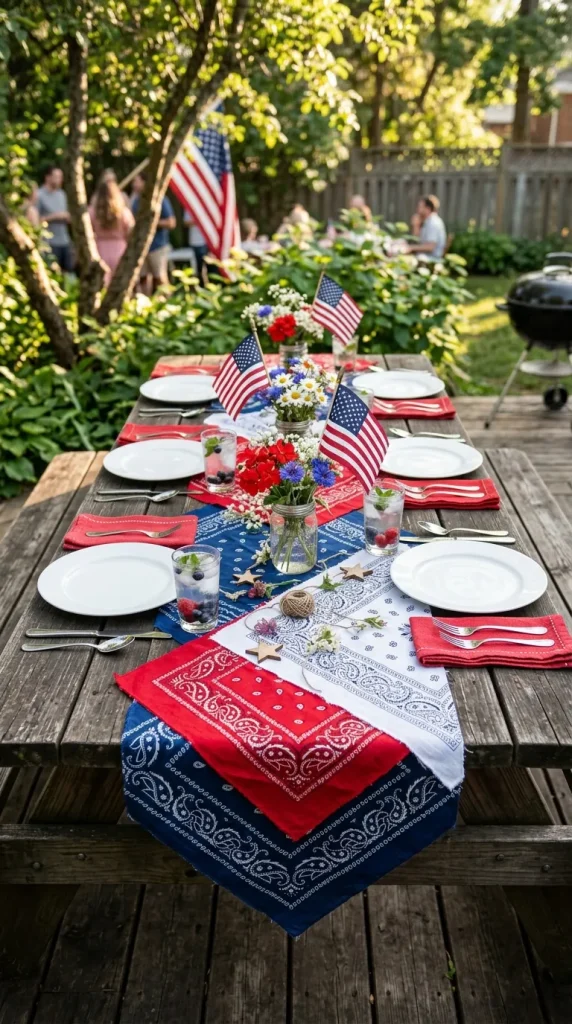
7. No-Sew Bandana Table Runner
A patriotic table runner creates a foundation for the rest of your tablescape. Instead of buying seasonal fabric, join red, white, and blue bandanas using fabric adhesive or fusible bonding tape.
This project combines color and pattern while remaining practical enough for picnics, buffet tables, and backyard dining.
Materials You Will Need
- Red, white, and blue bandanas
- Fabric adhesive or fusible bonding tape
- Iron and ironing board, if required
- Measuring tape
- Scissors
How to Make It
Wash, dry, and press the bandanas before assembling the runner. Arrange them across the table to determine the preferred color order and finished length.
Overlap the edges slightly and join them using fabric glue or fusible tape. Follow the product instructions carefully and allow the adhesive to cure before using the runner.
Who It Suits Best
This project suits casual entertainers, beginner crafters, farmhouse decor enthusiasts, and anyone organizing a picnic-style meal.
Decorating Tips
Allow the runner to hang six to ten inches over each end of the table. Pair its bold print with plain white dishes, clear glasses, and simple flowers to prevent the setting from appearing too busy.
Use solid-color napkins when the bandanas already feature detailed patterns.
Benefits
- Fast and beginner-friendly
- Washable when compatible materials are used
- Adds color to a large surface
- Can be repurposed as a backdrop or picnic accessory
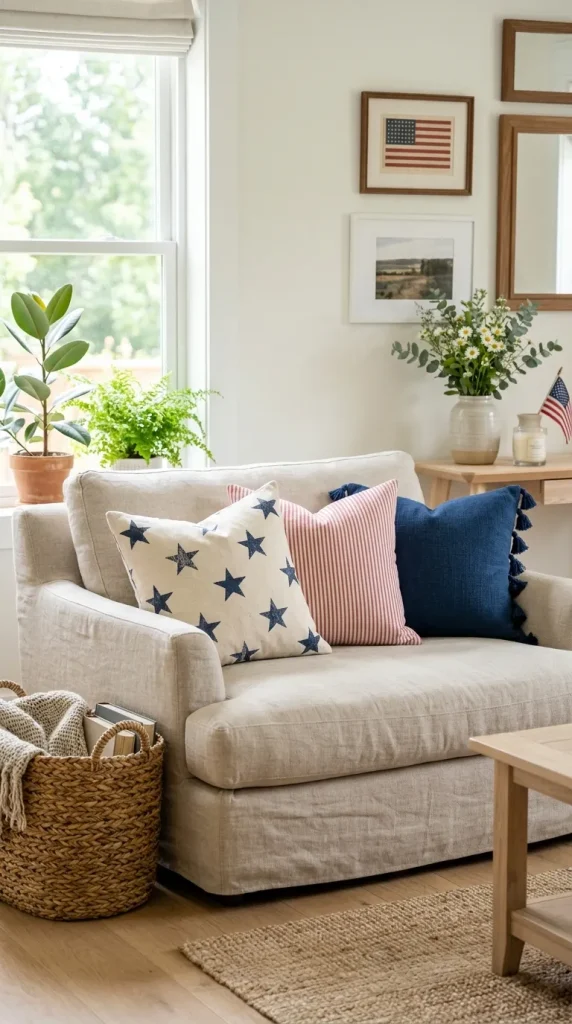
8. Star-Spangled Throw Pillows
Seasonal pillows can change the atmosphere of a room without requiring new furniture or a complete redesign. Instead of buying decorative pillows, update plain pillow covers with fabric paint, iron-on vinyl, felt stars, or removable fabric wraps.
Using covers rather than painting the pillows directly makes storage easier after the holiday.
Materials You Will Need
- Plain pillow covers
- Fabric paint or iron-on vinyl
- Star stencils
- Foam brush
- Cardboard inserts
- Painter’s tape
- Optional felt, fabric adhesive, or tassels
How to Make It
Place cardboard inside each pillow cover to stop paint from bleeding through. Secure a star stencil to the fabric and apply paint in thin layers using a gentle dabbing motion.
For stripes, use painter’s tape to create evenly spaced lines. Remove the tape while the paint is slightly damp for cleaner edges.
Allow the design to dry and heat-set it if required by the fabric paint manufacturer.
Who It Suits Best
This idea is perfect for renters, interior decor enthusiasts, porch owners, and crafters who prefer practical decorations that can be used throughout the summer.
Decorating Tips
Avoid making every pillow identical. Combine one star-print cover, one striped cover, and one solid red or blue pillow for a coordinated arrangement.
Place outdoor-rated covers on porch furniture and bring them inside during severe weather.
Benefits
- Refreshes a room without major changes
- Covers fold flat for convenient storage
- Designs can be customized to your furniture
- Provides both comfort and decoration
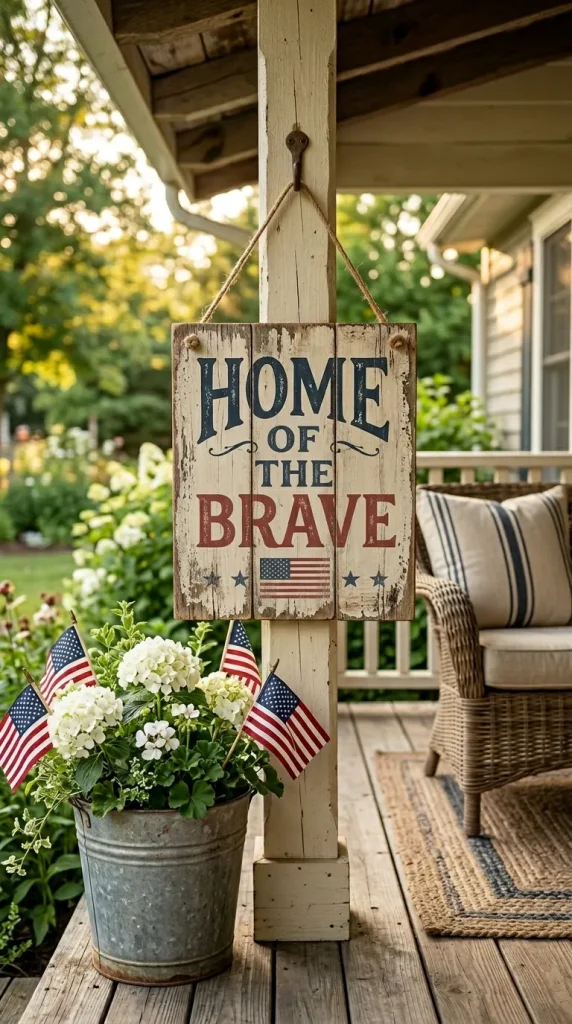
9. Rustic Patriotic Wooden Sign
A handmade wooden sign adds personality to an entryway, mantel, kitchen, or covered porch. Popular messages include “Home of the Brave,” “Let Freedom Ring,” “Stars and Stripes,” or a simple “Welcome.”
The sign can be made from new craft wood, reclaimed boards, or leftover wood from another home project.
Materials You Will Need
- Wooden board or pallet-style sign
- Sandpaper
- Red, white, and blue paint
- Letter and star stencils
- Foam brushes
- Pencil and ruler
- Clear protective sealant
- Hanging hardware
How to Make It
Sand the board until the surface and edges are smooth. Remove the dust and apply a base coat.
Plan the lettering on paper before transferring the design. Use a ruler to establish straight guidelines and secure stencils before applying paint.
After the paint dries, lightly sand selected areas for a distressed effect or leave the finish crisp for a modern appearance. Apply a clear sealant if the sign will be used outdoors.
Who It Suits Best
This project is best for farmhouse decor lovers, intermediate crafters, homeowners with covered porches, and anyone who wants a long-lasting decoration.
Decorating Tips
Choose a message that is readable from the sign’s intended viewing distance. Strong contrast—such as navy lettering on a white board—usually creates the clearest result.
Use no more than two font styles. Too many lettering styles can make the sign appear cluttered and difficult to read.
Benefits
- Durable and reusable
- Easy to personalize with names or messages
- Works indoors and outdoors when sealed
- Can become a meaningful handmade gift
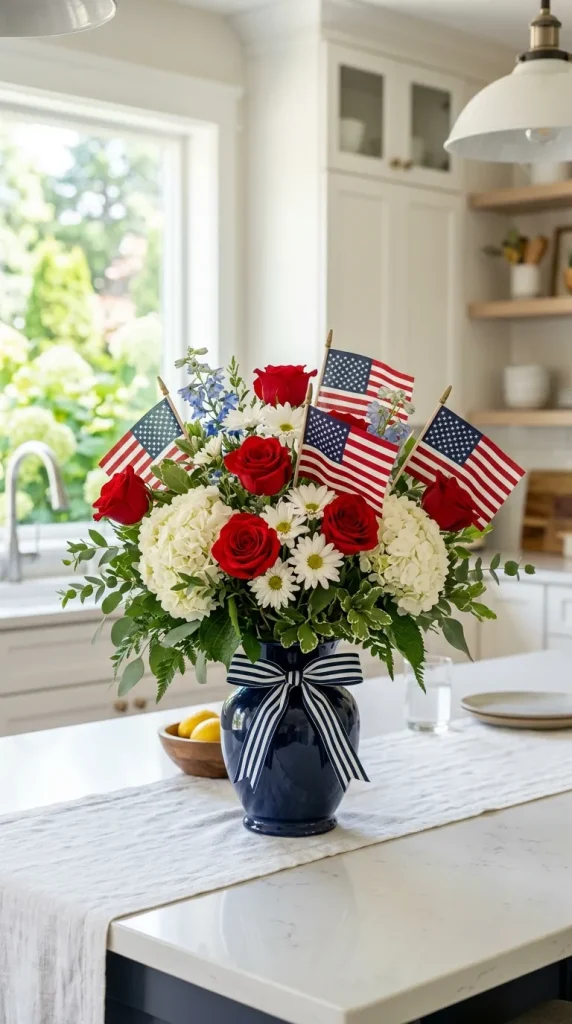
10. Red, White, and Blue Floral Display
A patriotic floral display is the fastest project on this list, yet it can look elegant enough for a formal dinner or holiday brunch.
Combine naturally red and white flowers with blue containers, ribbons, flags, or decorative picks. Truly blue fresh flowers can be difficult to find, so use blue accents rather than artificially dyed flowers when you want a natural appearance.
Materials You Will Need
- Red and white fresh or artificial flowers
- Blue vase, jar, or ribbon
- Greenery
- Floral shears
- Floral food for fresh arrangements
- Miniature flags or star picks
How to Make It
Choose a container that is approximately one-half to two-thirds the height of the finished arrangement. Trim the stems at an angle and remove leaves that would sit below the waterline.
Begin with greenery, add the largest flowers, and fill gaps with smaller blooms. Rotate the arrangement as you work so it looks balanced from multiple angles.
Finish with a blue ribbon, blue vase, or a few patriotic picks.
Who It Suits Best
This arrangement suits last-minute decorators, people who prefer elegant home styling, dinner hosts, and anyone who does not enjoy complicated craft projects.
Decorating Tips
Use red roses or carnations, white daisies or hydrangeas, and a navy container for a sophisticated display. For a casual country look, place red and white wildflowers in a blue mason jar.
Keep arrangements low on dining tables so guests can see one another easily.
Benefits
- Takes less than half an hour
- Works with fresh or artificial flowers
- Complements almost every decorating style
- Can be adjusted for small or large spaces
How to Make DIY Fourth of July Decor Look More Expensive
Inexpensive materials do not have to produce inexpensive-looking results. Thoughtful editing and presentation can make simple crafts feel polished.
Use a Consistent Color Palette
Traditional red, bright white, and royal blue create an energetic look. For a more refined interior, consider muted brick red, cream, navy, natural wood, and antique brass.
Choose one version of the palette and repeat it throughout the space.
Repeat Materials and Patterns
A room feels coordinated when the same elements appear more than once. For example, repeat striped ribbon on your wreath, centerpiece, and napkins.
Stars, gingham, denim, jute, galvanized metal, and natural wood are all effective supporting elements.
Decorate in Odd-Numbered Groups
Arrangements of three or five objects often look more natural than evenly paired items. Group three mason jars, five paper fireworks, or three lanterns of different heights.
Create One Strong Focal Point
You do not need decorations on every surface. A bold wreath, styled mantel, colorful table, or decorated porch can create more impact than many small, unrelated crafts.
Leave Some Empty Space
Crowding every shelf and table can make the room feel chaotic. Allow breathing room around important decorations so guests can notice the details.
Pro Tips for Successful Patriotic Decorating
- Start with items you already own. White dishes, red napkins, blue vases, baskets, trays, and neutral pillow covers can become part of your holiday display.
- Choose reusable materials. Fabric, wood, glass, ribbon, and artificial greenery usually survive storage better than delicate paper pieces.
- Prepare outdoor decorations for weather exposure. Use exterior paint, waterproof adhesive, and protective sealant when necessary.
- Use battery-operated lighting. It is safer and easier to position than open flames, particularly around children and pets.
- Measure before crafting. Check the width of your door, mantel, table, or railing before creating wreaths, signs, garlands, and runners.
- Photograph the finished setup. A photograph helps you remember how items were arranged when you reuse them next year.
- Label storage containers. Keep patriotic ribbons, signs, garlands, and table accessories together in a clearly marked bin.
Common DIY 4th of July Decorating Mistakes to Avoid
Using Too Many Patterns
Stars, stripes, gingham, bandana prints, and fireworks can compete when used simultaneously. Select one dominant pattern and use the others in smaller amounts.
Ignoring Outdoor Safety
Do not place paper crafts near grills, fire pits, candles, or fireworks. Secure lightweight decorations so they cannot blow into flames, streets, pools, or neighboring properties.
Using Indoor Materials Outside
Regular paper, untreated wood, and some craft paints can be damaged by moisture and sunlight. Place delicate items in covered areas or use outdoor-rated materials.
Skipping Surface Preparation
Paint may peel from dirty jars, greasy cans, dusty wood, or unwashed fabric. Clean and prepare every surface before applying paint or adhesive.
Making Every Item Identical
A perfectly matched display can feel flat. Create variety through height, texture, scale, and pattern while keeping the color palette consistent.
Overdecorating the Dining Table
Tall arrangements and too many accessories can interfere with serving food and conversation. Keep centerpieces low, stable, and easy to move.
Waiting Until the Event Day
Even simple projects may require drying, freezing, sealing, or adhesive-curing time. Complete painted and glued pieces at least one day before your celebration whenever possible.
Frequently Asked Questions
What are the easiest DIY 4th of July decorations for beginners?
The easiest projects include patriotic mason jars, paper firework bursts, a bandana table runner, a floral arrangement, and a no-sew fabric garland. These ideas use basic materials and do not require advanced tools or crafting experience.
How can I decorate for the Fourth of July on a small budget?
Reuse jars, cans, scrap fabric, plain pillow covers, leftover wood, and household trays. Focus on one high-impact area, such as the front door or dining table, instead of decorating every room. Dollar-store ribbon, paper, flags, and artificial flowers can also reduce costs.
Can homemade Fourth of July decorations be used outdoors?
Yes, but the materials must be suitable for outdoor conditions. Use weather-resistant paint, exterior sealant, waterproof adhesive, and durable fabrics. Keep paper crafts and untreated wood in covered areas, and bring lightweight items indoors during rain or strong wind.
When should I begin decorating for the Fourth of July?
Many people begin decorating in mid-to-late June and keep patriotic pieces displayed through the Fourth of July weekend. Neutral Americana decorations can remain in place for most of the summer, especially when they use navy, cream, natural wood, and muted red.
How do I store DIY patriotic decorations?
Clean every item before storage and make sure painted or fabric pieces are fully dry. Wrap fragile decorations in tissue paper, store wreaths in structured containers, fold fabric items neatly, and place small accessories in labeled bags. Keep everything in a dry, temperature-controlled space when possible.
Final Thoughts
Creating a memorable holiday atmosphere does not require expensive store-bought accessories or complicated crafting skills. The best easy DIY 4th of July decorations combine simple materials, practical techniques, and thoughtful styling.
Start with one project that fits your available time and space. A floral centerpiece may be enough for a small dinner, while a wreath, lawn stars, lanterns, and fabric garland can transform a larger celebration.
Most importantly, let your decorations reflect your personality. Choose polished navy and cream accents for an elegant home, distressed wood and bandanas for a farmhouse look, or bright paper fireworks for a playful family party


Leave a Reply