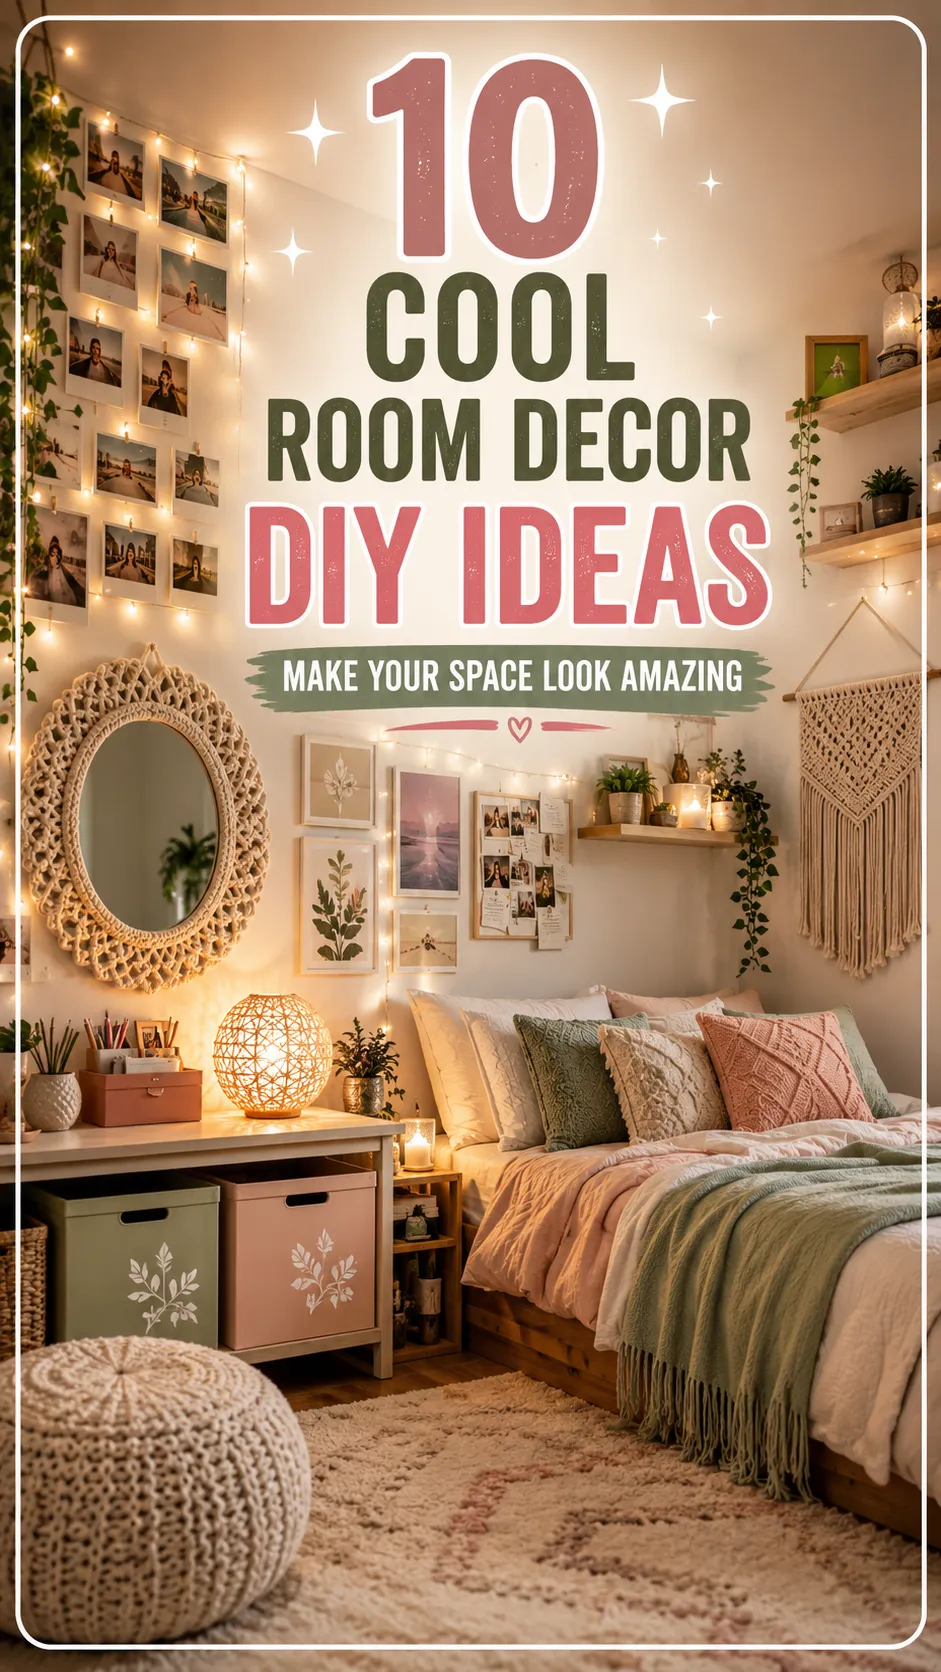
Your room should feel like more than a place where you sleep, study, or store your belongings. It should reflect your personality, inspire your creativity, and help you feel comfortable whenever you walk through the door.
However, creating a stylish room can quickly become expensive. Trendy wall art, decorative lighting, storage accessories, and designer furniture often cost more than expected. Even worse, mass-produced decorations may not match your room’s size, color palette, or personal style.
That is where cool room decor DIY ideas can completely transform your space.
With a few affordable materials and some creativity, you can make decorations that look customized, stylish, and surprisingly professional. DIY room decor also gives you control over the colors, textures, dimensions, and overall mood of your room.
Whether you love minimalist interiors, cozy bohemian spaces, colorful maximalist rooms, modern gaming setups, or soft aesthetic bedrooms, the following projects can be adapted to match your taste.
This guide explores 10 creative DIY room decoration ideas, explains who each project suits best, and provides practical styling advice, benefits, difficulty levels, and maintenance tips.
Quick Comparison of Cool Room Decor DIY Ideas
| DIY Decor Idea | Approximate Time | Difficulty | Estimated Cost | Maintenance |
|---|---|---|---|---|
| Floating Photo Display | 30–45 minutes | Easy | Low | Dust occasionally |
| Custom Neon-Style Sign | 1–2 hours | Moderate | Medium | Wipe gently |
| Painted Arch Accent Wall | 2–4 hours | Moderate | Medium | Touch up when needed |
| Hanging Plant Shelf | 1–2 hours | Moderate | Medium | Water and dust regularly |
| Textured Canvas Art | 1–2 hours | Easy | Low to medium | Minimal |
| DIY Cloud Light | 1–2 hours | Moderate | Medium | Clean carefully |
| Upcycled Crate Storage | 2–3 hours | Moderate | Low | Dust and inspect |
| Mirror Mosaic Frame | 1–2 hours | Easy | Low to medium | Clean weekly |
| Cozy Reading Corner | 1–3 hours | Easy | Medium | Wash fabrics regularly |
| Pegboard Organizer Wall | 2–3 hours | Moderate | Medium | Reorganize as needed |
1. Create a Floating Photo and Memory Display
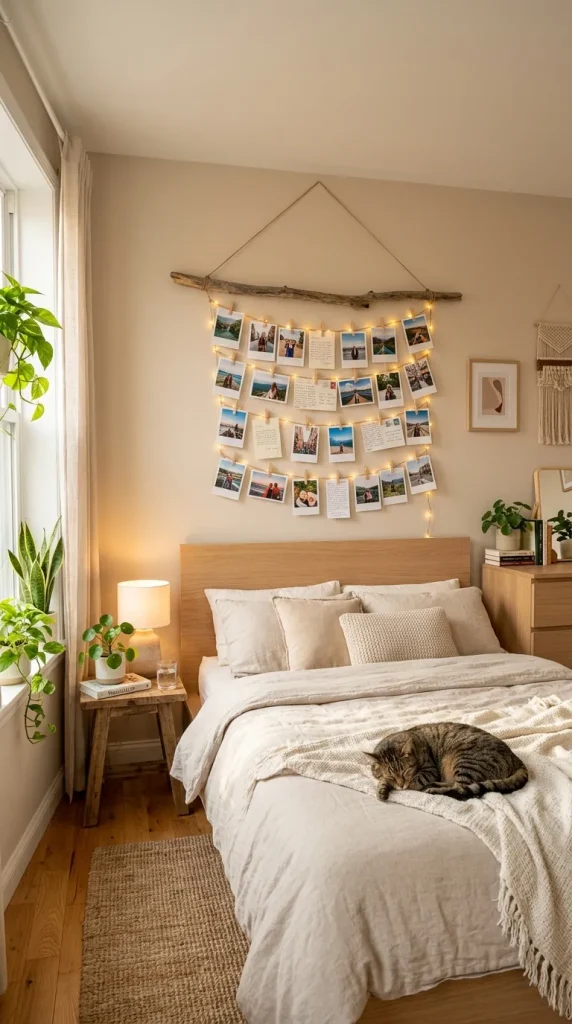
A floating photo display is one of the easiest ways to personalize an empty wall. Instead of placing photographs in traditional frames, suspend them from string, wire, ribbon, or a slim wooden branch.
You can include printed photographs, postcards, concert tickets, handwritten notes, travel memories, artwork, and inspirational quotes. Small wooden clips make it easy to replace the displayed items whenever your mood or interests change.
Who It Suits Best
This idea works especially well for:
- Teenagers and college students
- Renters who cannot make permanent wall changes
- Travel lovers
- Photography enthusiasts
- Anyone who enjoys sentimental and personalized decor
How to Make It
Attach two adhesive hooks to the wall and stretch decorative string or thin wire between them. Secure photographs and keepsakes using miniature clips.
For a more natural look, hang several strings from a smooth wooden branch. You can also weave battery-operated fairy lights around the display to create a warm glow.
Styling Tips
Choose photographs with similar tones for a polished appearance. Black-and-white prints create a sophisticated display, while colorful images feel playful and energetic.
Keep a consistent gap between the photographs. A balanced arrangement looks more intentional than randomly placed prints.
You can also organize the display around a theme, such as:
- Favorite travel destinations
- Family memories
- Friendship photographs
- Academic achievements
- Fashion inspiration
- Monthly goals
Benefits
A floating photo display is affordable, lightweight, and easy to update. It turns personal memories into meaningful decoration while filling an otherwise unused wall.
Because adhesive hooks can be removed, this is also one of the most practical renter-friendly DIY room decor ideas.
2. Make a Custom Neon-Style LED Sign
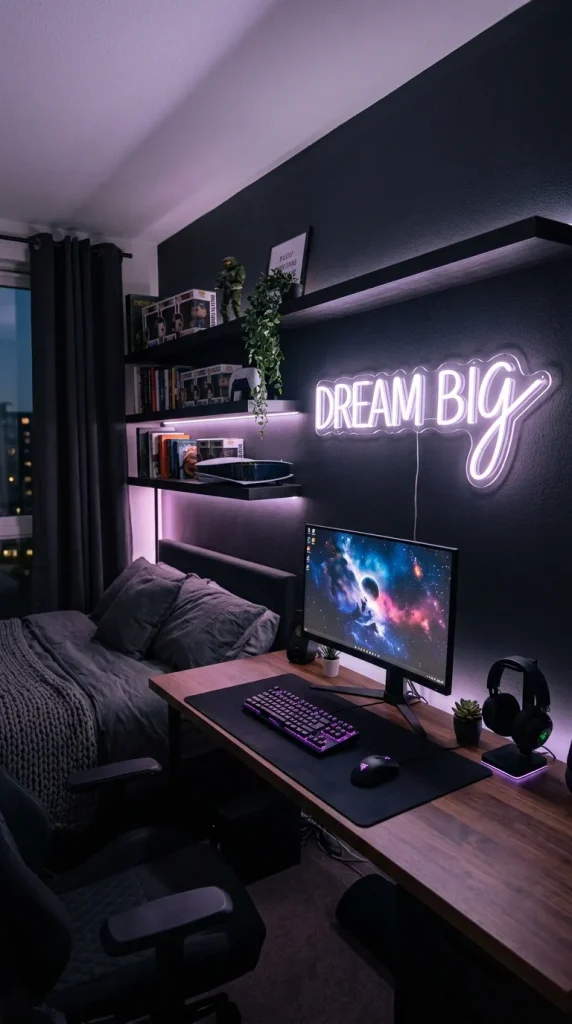
Neon signs instantly make a room feel modern, creative, and social-media ready. Real glass neon signs can be expensive, but flexible LED neon wire offers a safer and more affordable alternative.
You can shape the wire into your name, a short phrase, a heart, a lightning bolt, a flower, a moon, or another simple symbol.
Who It Suits Best
A DIY neon-style sign is ideal for:
- Modern bedrooms
- Gaming rooms
- Content-creation spaces
- Music-themed rooms
- Dorm rooms
- Colorful or futuristic interiors
Materials and Method
Sketch your chosen word or symbol on a piece of paper. Place a transparent acrylic sheet over the design and carefully arrange the flexible LED wire along the outline.
Secure the wire with clear clips, transparent cable ties, or strong adhesive suitable for acrylic. Hide the battery pack or power cord behind nearby furniture.
Styling Tips
Use one continuous line whenever possible because complicated shapes can become difficult to form.
Choose a color that complements your room instead of competing with it. For example:
- Warm white suits minimalist and neutral rooms.
- Pink creates a playful, romantic atmosphere.
- Blue works well in gaming or futuristic spaces.
- Purple adds a creative and dreamy effect.
- Orange or yellow provides a retro-inspired glow.
Mount the sign above a desk, bed, dresser, or photo wall so it becomes a clear focal point.
Benefits
A custom neon-style sign provides ambient lighting and wall decoration at the same time. It can also make photographs and videos look more visually attractive.
Unlike a store-bought sign, your DIY version can feature a word or design that has personal meaning.
3. Paint a Modern Arch Accent Wall
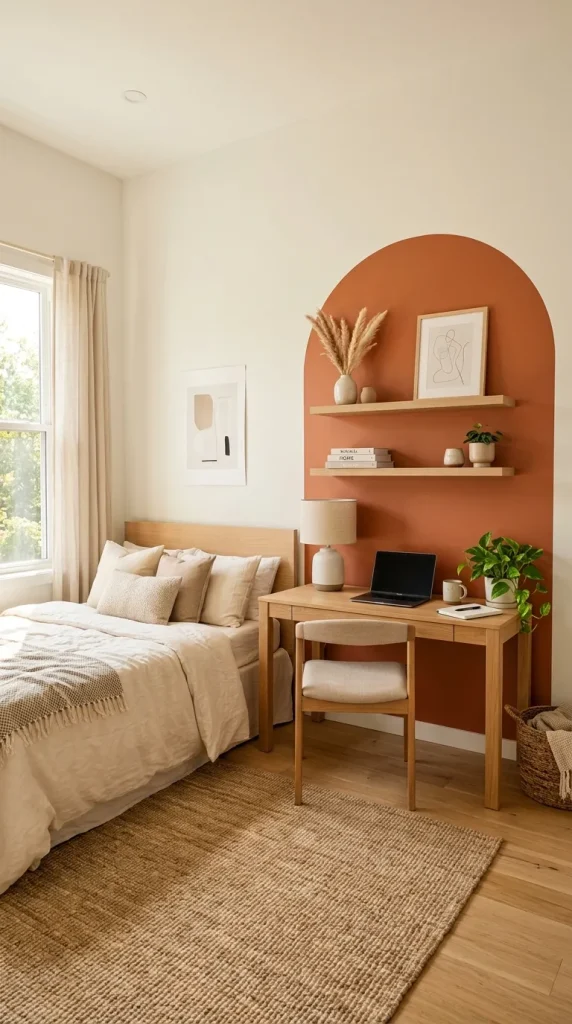
An accent arch can create the illusion of an architectural feature without construction or expensive materials. It can visually frame a bed, desk, mirror, shelf, or reading chair.
This project works particularly well in small rooms because it creates a strong focal point without using floor space.
Who It Suits Best
A painted arch is a good choice for:
- Minimalist bedrooms
- Small apartments
- Modern or Scandinavian interiors
- Bohemian rooms
- People who want a noticeable makeover on a limited budget
How to Create a Clean Arch
First, decide how wide and tall the arch should be. Mark two straight vertical lines using a measuring tape and level.
Tie a pencil to a piece of string. Hold the other end at the center point of the arch and draw a smooth semicircle. Apply painter’s tape along the straight edges and carefully paint the curved top with a smaller brush.
Two thin coats usually produce a smoother finish than one heavy coat.
Styling Tips
Earthy shades such as terracotta, beige, sage green, dusty rose, and warm brown create a cozy appearance. Deep navy, charcoal, emerald, or burgundy can produce a dramatic effect.
Place furniture within the painted area to make the arch look purposeful. For example, position a desk inside the shape and add two floating shelves above it.
You can also paint a double arch using two coordinated colors for a more artistic design.
Benefits
A painted arch requires only a small amount of paint but can transform an entire wall. It introduces color without overwhelming the room and provides a professional-looking background for furniture and accessories.
4. Build a Hanging Plant Shelf
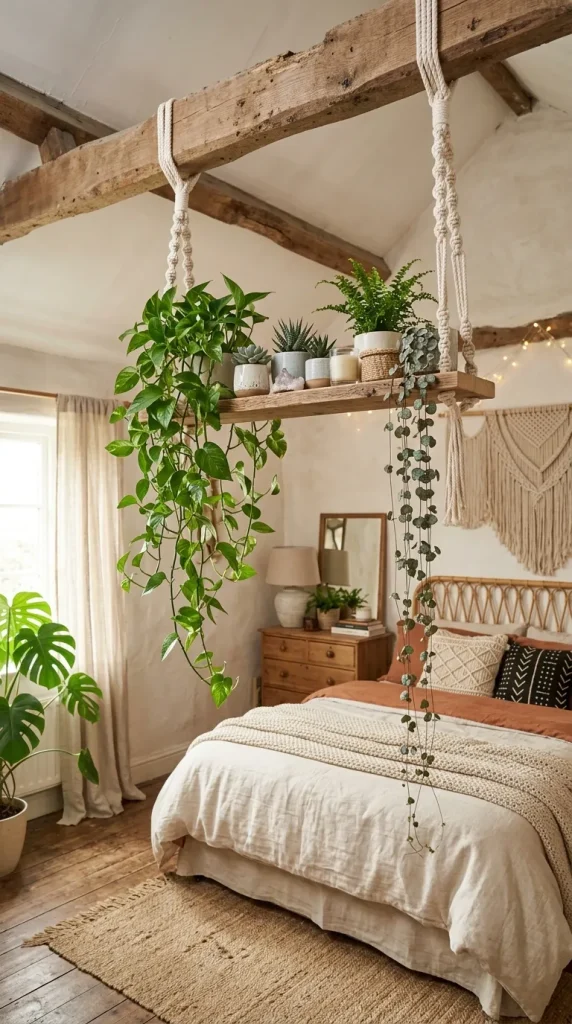
Plants bring color, texture, and life into a room. A hanging plant shelf allows you to display several small pots without occupying a desk, dresser, or bedside table.
The shelf can be made from a wooden board and strong cotton rope. It looks especially attractive near a window where plants can receive natural light.
Who It Suits Best
This project is best for:
- Plant lovers
- Bohemian or nature-inspired rooms
- Small bedrooms with limited surface space
- People who enjoy organic materials
- Anyone wanting to soften a modern interior
How to Make It
Cut or purchase a wooden board in the desired length. Sand the edges until smooth and apply paint, stain, or clear protective finish.
Drill holes near the four corners and thread sturdy rope through them. Tie secure knots beneath the shelf and hang it from a ceiling hook or strong wall bracket.
Before adding plants, confirm that the hook and rope can safely support the combined weight.
Styling Tips
Use lightweight pots rather than heavy ceramic containers. Combine trailing plants with compact upright varieties to create visual variety.
Good decorative options include:
- Pothos
- String of hearts
- Spider plants
- Small succulents
- Artificial vines
- Miniature ferns
Add a small candle, crystal, decorative book, or framed print between the pots, but avoid overcrowding the shelf.
Benefits
A hanging shelf uses vertical space efficiently and brings a calming natural element into the room. It can also make a blank corner appear more complete.
Artificial plants provide a similar aesthetic for rooms with limited sunlight or for people who prefer low-maintenance decorations.
5. Design Textured Canvas Wall Art
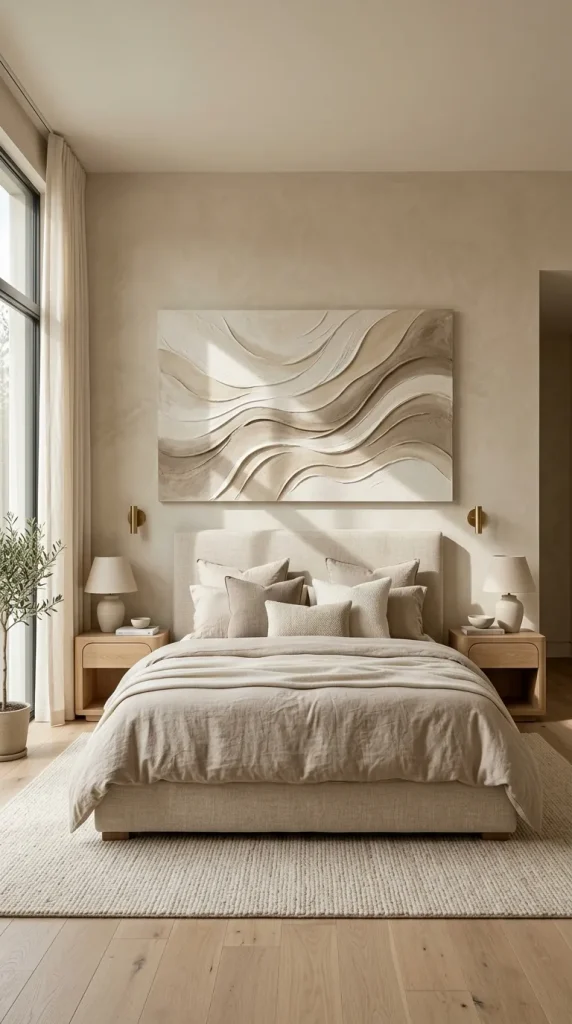
Large wall art often comes with a large price tag. Fortunately, you can create modern textured artwork using an inexpensive canvas, joint compound or modeling paste, and basic painting tools.
The finished piece can resemble artwork found in a premium interior-design store.
Who It Suits Best
Textured canvas art is ideal for:
- Neutral and minimalist rooms
- Modern bedrooms
- Luxury-inspired interiors
- Creative beginners
- People who need oversized decor on a budget
Step-by-Step Method
Apply a thin layer of modeling paste or joint compound across the canvas. Use a palette knife, old credit card, comb, spoon, or textured sponge to create raised lines and patterns.
Allow the surface to dry completely. Depending on the thickness, this may take several hours or overnight.
Paint the artwork in one color for a clean, sculptural look, or add multiple neutral shades for more dimension.
Styling Tips
Simple designs often look more expensive than complicated ones. Try curved lines, overlapping arches, waves, circles, or irregular organic shapes.
For a cohesive result, repeat colors already present in your room. A beige room may benefit from cream, taupe, brown, and muted gold artwork.
A slim wooden frame can make the project look more professionally finished.
Benefits
This DIY project is highly customizable and forgiving. Small imperfections contribute to the handmade texture rather than ruining the result.
It is also an excellent way to create large-scale wall decor without purchasing an expensive print or original painting.
6. Make a Dreamy DIY Cloud Light
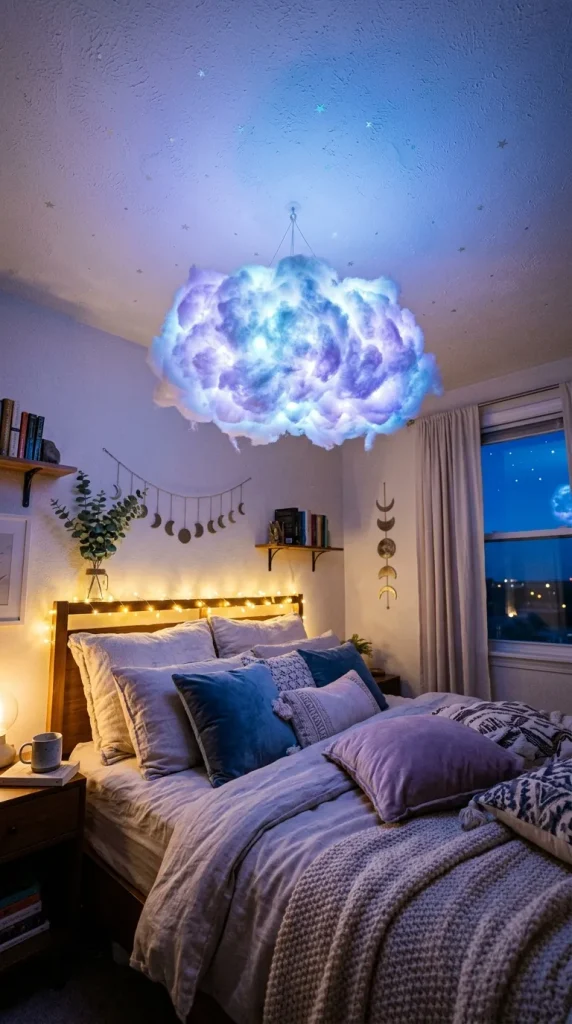
A cloud light creates a soft, imaginative atmosphere and works as both decorative lighting and an artistic ceiling feature. It is especially effective in cozy bedrooms, gaming rooms, and creative studios.
The classic version uses lightweight synthetic fiber, LED lights, and a lantern-style base.
Who It Suits Best
A cloud light works well for:
- Dreamy aesthetic rooms
- Gaming setups
- Children’s or teenagers’ bedrooms
- Photography and video backgrounds
- Fantasy-inspired interiors
Safe Construction Method
Use a lightweight paper lantern or a flame-resistant craft base. Attach soft polyester fiberfill using an appropriate adhesive, shaping it into uneven cloud-like clusters.
Insert only low-heat LED lights. Battery-operated LEDs are often the easiest option because they do not require a visible wall cable.
Hang the cloud securely using ceiling hooks designed for its weight.
Important Safety Note
Never place fiberfill around traditional bulbs, exposed electrical components, candles, or any heat-producing light source. Use certified low-heat LEDs and keep the battery pack accessible.
Styling Tips
A single large cloud can serve as a statement feature, while several smaller clouds can create a more immersive design.
Soft white lights provide a realistic glow. Color-changing LEDs create a dramatic effect for gaming or entertainment rooms.
Place the cloud above a reading chair, near a creative desk, or in a corner rather than directly over the bed if secure mounting is uncertain.
Benefits
A DIY cloud light transforms ordinary lighting into an experience. It introduces softness, depth, and a playful sense of imagination while making the room feel more memorable.
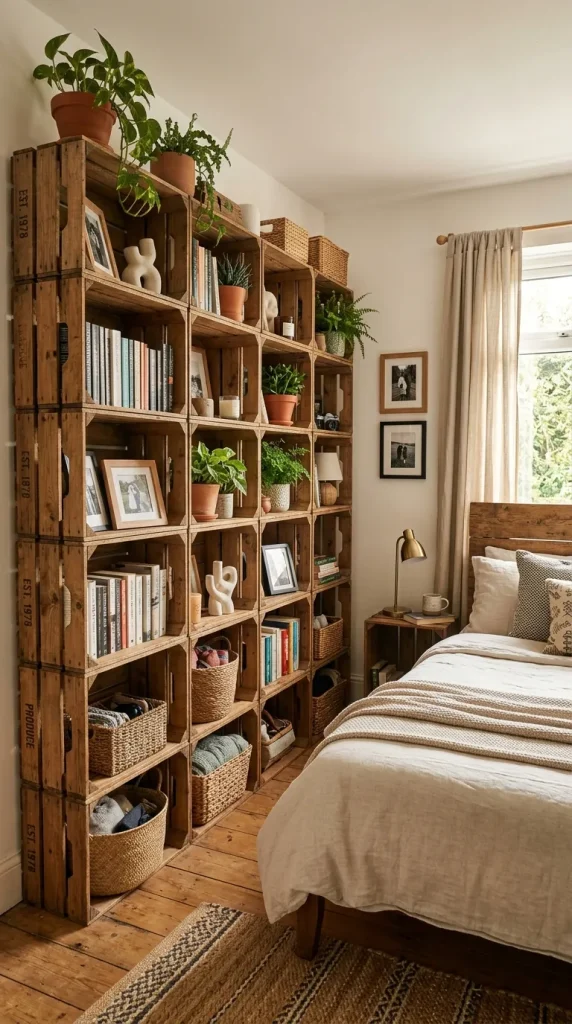
7. Turn Wooden Crates into Stylish Storage
Storage is essential, but it does not have to look boring. Wooden crates can be transformed into shelves, bedside tables, bookcases, shoe organizers, or modular storage units.
This project combines decoration with practical organization, making it especially valuable in small rooms.
Who It Suits Best
Upcycled crate storage is suitable for:
- Small bedrooms
- Rustic or industrial interiors
- Students and renters
- Book lovers
- People who need flexible storage
- Budget-conscious decorators
How to Upgrade the Crates
Begin by sanding rough surfaces and checking for loose nails or damaged wood. Paint or stain each crate, then apply a protective finish.
Crates can be stacked horizontally or vertically. For safety, connect stacked units with screws or brackets and anchor tall arrangements to the wall.
You can also attach small caster wheels to the bottom crate to create mobile storage.
Styling Tips
Use matching storage baskets inside the crates to hide clutter. Leave some sections open for books, plants, framed pictures, or decorative objects.
For a modern appearance, paint the crates matte black, white, or sage green. Natural stain works well in rustic, farmhouse, and bohemian rooms.
Adding peel-and-stick wallpaper to the inside back panels can introduce subtle color or pattern.
Benefits
Wooden crates are affordable, versatile, and easy to rearrange. They allow you to create storage based on your exact space instead of adapting your room to a fixed piece of furniture.
This idea also supports sustainable decorating by giving simple or second-hand materials a new purpose.
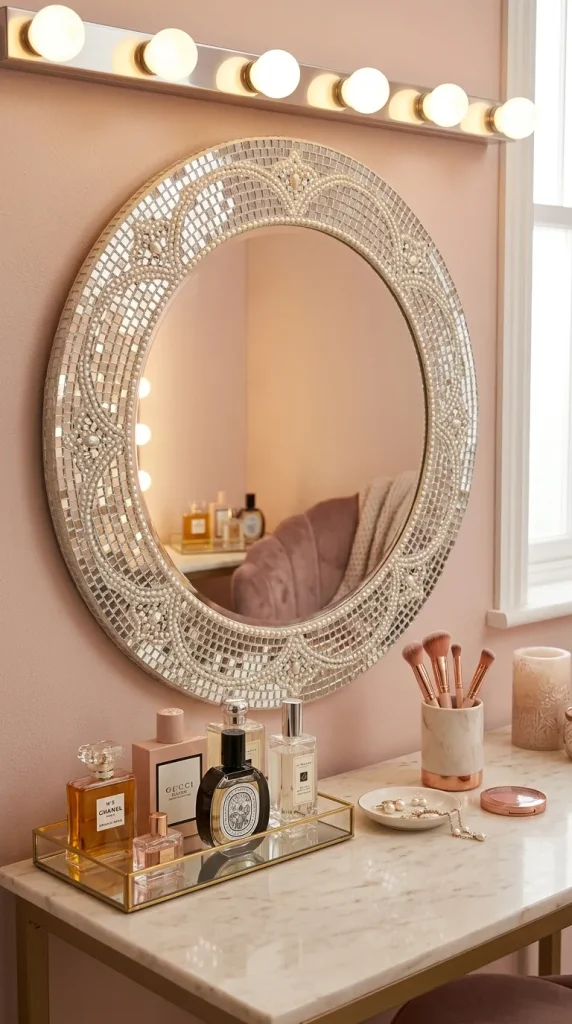
8. Create a Mirror Mosaic or Decorative Mirror Frame
Mirrors reflect light and can make a small room appear larger. Instead of buying an expensive statement mirror, decorate an existing plain mirror with small tiles, wooden pieces, beads, shells, rope, or lightweight mirrored shapes.
The result can become a functional piece of wall art.
Who It Suits Best
This idea works for:
- Small or dark bedrooms
- Vanity areas
- Glamorous interiors
- Coastal or bohemian rooms
- Entryways and dressing corners
- Anyone with an old mirror that needs an update
How to Make It
Clean the mirror and frame thoroughly. Arrange decorative pieces around the border before applying adhesive. This allows you to test spacing and symmetry.
Attach the materials one section at a time. Let the adhesive cure fully before hanging or moving the mirror.
Wear protective gloves if you are working with glass or mirrored tiles, and smooth or cover sharp edges.
Styling Tips
Pearls and metallic accents create a glamorous look. Rope and shells suit coastal decor. Wooden half-round pieces offer a modern or Scandinavian feel.
For a sunburst design, attach lightweight wooden dowels around a round mirror and paint them in a consistent finish.
Position the mirror opposite or beside a window to maximize reflected daylight.
Benefits
A decorative mirror can brighten the room, create the impression of more space, and act as a strong focal point. Updating an old mirror is also significantly cheaper than purchasing a new designer piece.
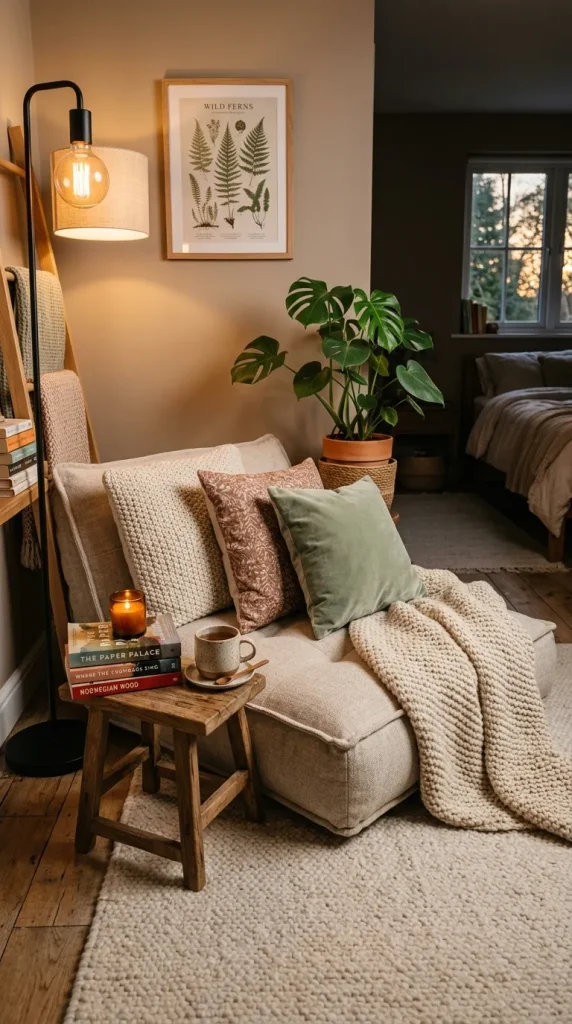
9. Build a Cozy Reading and Relaxation Corner
Not every DIY project requires building or painting. You can transform an unused corner into a comfortable retreat by layering soft furnishings, lighting, and meaningful accessories.
A dedicated relaxation corner gives the room a stronger purpose and creates a space for reading, journaling, listening to music, or taking a quiet break.
Who It Suits Best
A cozy corner is perfect for:
- Book lovers
- Students
- People who journal or meditate
- Large bedrooms with an empty corner
- Anyone who wants a screen-free relaxation space
Essential Elements
Start with comfortable seating. Depending on available space, use a floor cushion, beanbag, small armchair, bench, or layered pillows.
Add a soft rug to visually define the zone. Include a small table or crate for drinks, books, and personal items.
Finish the corner with warm lighting, such as a floor lamp, wall-mounted reading light, or battery-operated lamp.
Styling Tips
Layer different textures rather than using too many colors. A knitted throw, velvet cushion, woven basket, and soft rug can make a neutral corner feel rich and inviting.
Keep frequently used books within reach. Add one plant or framed print for personality, but leave enough open space to avoid visual clutter.
Use warm white lighting between approximately 2700K and 3000K for a relaxing atmosphere.
Benefits
A reading corner encourages relaxation and helps separate leisure from sleep or work. It also transforms awkward, unused floor space into one of the most appealing areas of the room.
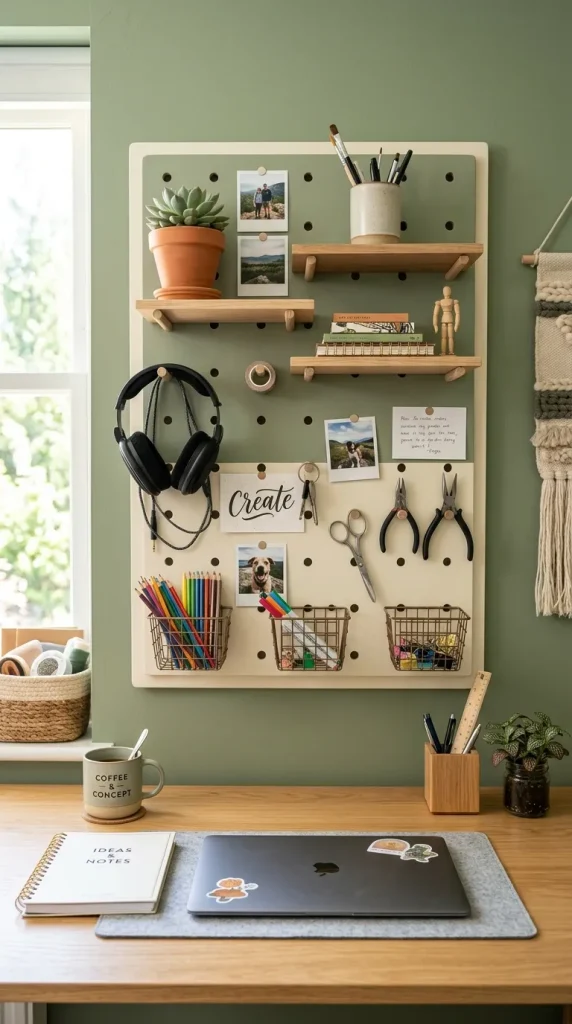
10. Install a Custom Pegboard Organizer Wall
A pegboard is one of the most flexible DIY room organization systems. Hooks, baskets, shelves, clips, and small containers can be moved whenever your storage needs change.
It can organize stationery, jewelry, craft materials, headphones, photographs, tools, plants, and daily essentials.
Who It Suits Best
A pegboard organizer is excellent for:
- Students
- Artists and crafters
- Small home offices
- Gaming setups
- Makeup or jewelry collections
- Rooms with limited drawer space
How to Install It
Purchase a pre-cut pegboard or create one from plywood using accurately spaced holes. Sand the surface and apply paint or clear finish.
Mount the board slightly away from the wall using spacers so hooks can fit through the holes. Use suitable wall anchors based on the wall material and the expected weight.
Arrange the largest shelves and containers first. Fill smaller gaps with hooks, clips, and decorative items.
Styling Tips
Paint the pegboard in the same color as the wall for a subtle built-in appearance. Choose a contrasting color when you want it to become a focal feature.
Combine functional and decorative pieces. For example, place notebooks and scissors beside a small plant, motivational card, or photograph.
Group similar items together and leave some empty space so the board does not appear overcrowded.
Benefits
A pegboard keeps important items visible and accessible while freeing up desk and drawer space. Its modular design means you can reorganize it repeatedly without purchasing a completely new storage system.
Pro Tips for a Professional-Looking DIY Room Makeover
Begin With a Clear Color Palette
Choose three main colors before starting your projects:
- A dominant base color
- A secondary supporting color
- A smaller accent color
For example, you might combine cream, sage green, and black. Repeating these colors across your wall art, storage, bedding, and accessories will make separate DIY projects feel connected.
Measure Every Space Carefully
Never rely on visual estimates. Measure the wall, furniture, shelf, and decorative object before cutting materials or drilling holes.
Use painter’s tape to mark the size of a proposed shelf, canvas, or accent arch. Step back and check the proportions before committing.
Repeat Materials and Textures
A room feels more cohesive when certain finishes appear more than once. If you use natural wood for a hanging shelf, repeat it in a picture frame or crate organizer.
Similarly, a small metallic detail can be repeated in lamp bases, drawer handles, mirror trim, or decorative containers.
Hide Wires and Hardware
Visible cables can make even beautiful decor look unfinished. Use cable clips, cord covers, adhesive channels, or furniture placement to keep wires organized.
Select hooks and brackets that match the wall or decor whenever possible.
Prioritize Function as Well as Style
The most successful cool room decor DIY ideas solve a practical problem while improving the appearance of the room.
A pegboard adds visual interest and organization. A mirror decorates the wall and reflects light. A reading corner fills empty space and supports relaxation.
Test Removable Options First
Renters should use removable hooks, peel-and-stick materials, tension rods, and freestanding displays where appropriate.
Always review product instructions and test adhesive materials in a hidden area because some removable products can still affect delicate paint.
Common DIY Room Decor Mistakes to Avoid
Starting Without a Plan
Buying materials before selecting a style can lead to mismatched colors, unnecessary expenses, and unfinished projects. Create a simple mood board before shopping.
Adding Too Many Small Decorations
Numerous tiny objects can make a room feel cluttered. Use fewer, slightly larger statement pieces and leave open areas where the eye can rest.
Ignoring Scale
A small picture may look lost above a large bed, while an oversized shelf can overwhelm a narrow desk. Match each decoration to the furniture and wall around it.
Choosing Appearance Over Safety
Decorative projects must be securely mounted. Use proper anchors for shelves, mirrors, planters, and lighting. Avoid placing heavy items above the bed.
Only use low-heat, certified LED products in handmade lighting projects.
Using the Wrong Adhesive
Different materials require different adhesives. A glue designed for paper may not hold wood, glass, fabric, or plastic.
Read the manufacturer’s instructions and confirm that the product is appropriate for both surfaces.
Skipping Surface Preparation
Dust, grease, rough edges, and peeling paint can affect the final result. Clean, sand, prime, or dry the surface as required before decorating it.
Following Trends Too Literally
Trends can provide inspiration, but your room should still reflect your interests and daily habits. Choose adaptable elements rather than copying every popular aesthetic at once.
How to Choose the Right DIY Decor Idea for Your Room
Begin by identifying the biggest problem in your room.
Is the wall empty? Create textured canvas art, a photo display, or a painted arch.
Is the space dark? Decorate a mirror or add a custom LED sign.
Is the room cluttered? Build crate storage or install a pegboard organizer.
Does the room feel cold or impersonal? Add plants, photographs, warm lighting, and layered fabrics.
For the best results, begin with one focal project and one functional project. For example, combine a painted arch with a pegboard or pair a cloud light with storage crates.
Completing two coordinated projects usually creates a more noticeable transformation than adding several unrelated accessories.
Frequently Asked Questions
What are the easiest cool room decor DIY ideas for beginners?
Floating photo displays, textured canvas art, decorative mirror frames, and cozy reading corners are among the easiest projects. They require few tools and can usually be completed in one afternoon.
How can I decorate my room without spending much money?
Reuse materials you already own, update second-hand items, print your own wall art, repurpose wooden crates, and use leftover paint. Focus on one visible area rather than purchasing decorations for the entire room at once.
What DIY room decor is suitable for renters?
Use removable adhesive hooks, freestanding crate shelves, tension-rod displays, leaning mirrors, fabric wall hangings, and peel-and-stick products designed for temporary use. Test adhesives before applying them to a large area.
How do I make DIY room decor look expensive?
Use a limited color palette, accurate measurements, clean edges, quality hardware, and balanced spacing. Neutral shades, natural wood, textured fabrics, simple shapes, and matte finishes often create a more polished appearance.
How many DIY decorations should I add to one room?
There is no fixed number. Begin with one main focal point and two or three supporting details. Stop when the space feels complete but still has visible open areas. Function, scale, and visual balance matter more than quantity.
Conclusion
A memorable room does not require expensive furniture or designer accessories. The most effective spaces are thoughtful, functional, and personal.
These 10 cool room decor DIY ideas allow you to improve empty walls, solve storage problems, introduce better lighting, and express your creativity without completely renovating your room.
Start with the project that solves your room’s most obvious problem. Measure carefully, select a consistent color palette, and complete one idea before moving to the next. Even a simple photo display, painted arch, or customized mirror can make the entire space feel more intentional.


Leave a Reply