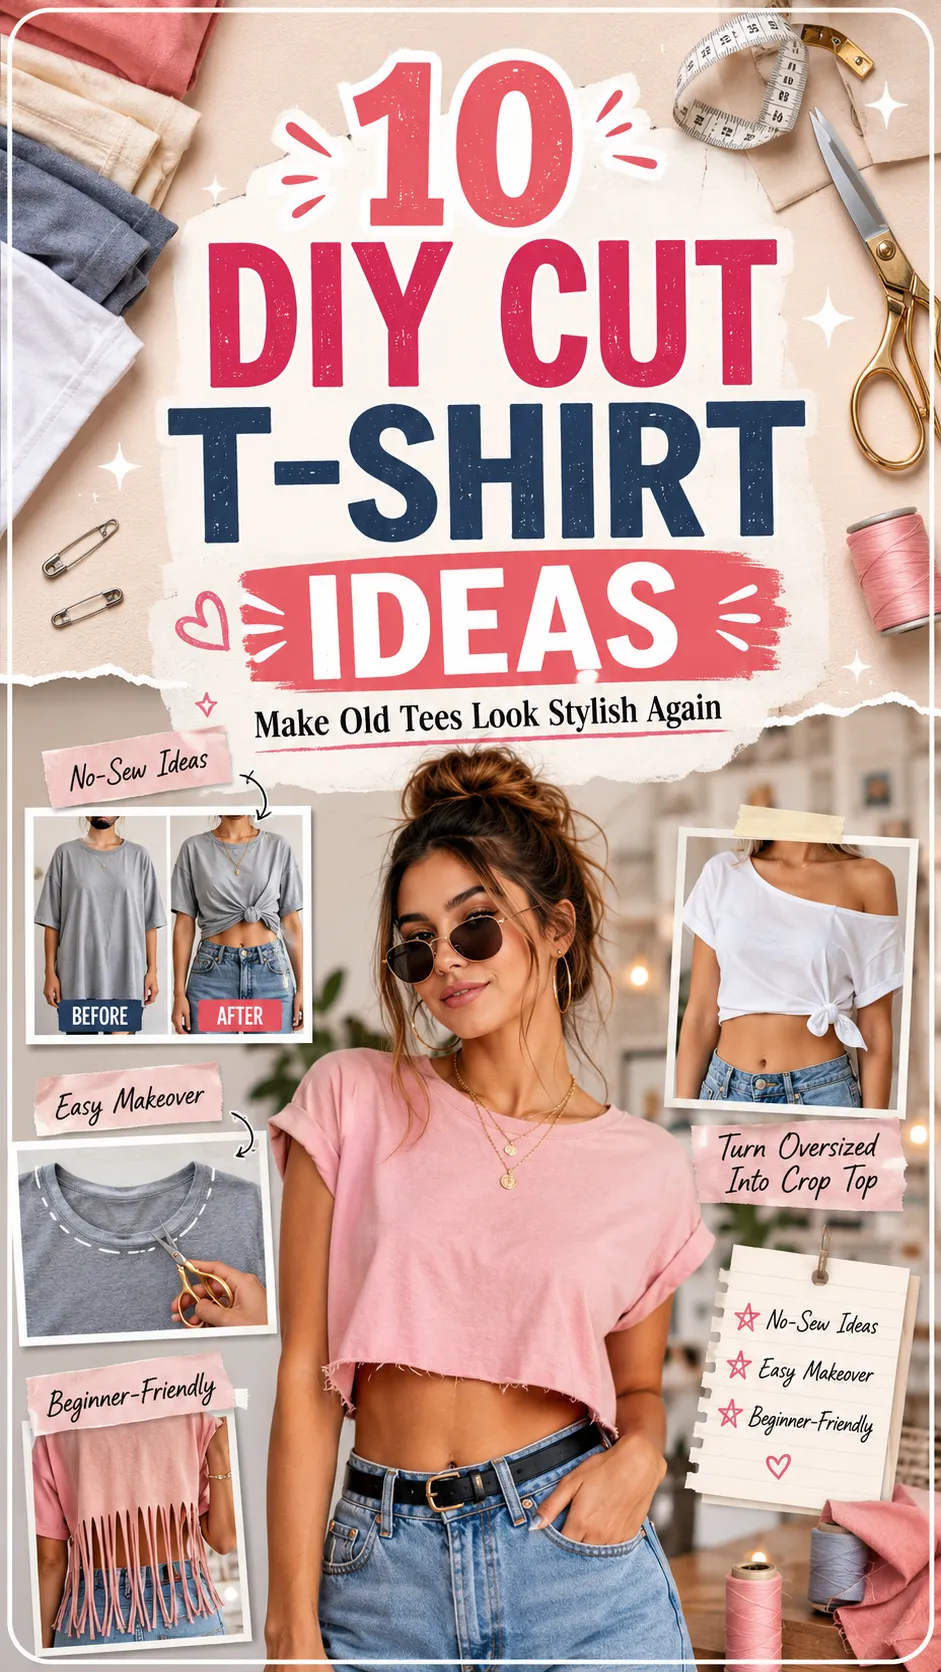
Meta Title: 10 DIY Cut T-Shirts Ideas for a Stylish Makeover
Meta Description: Discover 10 DIY cut T-shirts ideas with easy steps, styling tips, benefits, and creative ways to transform old tees into fashionable outfits.
SEO Keywords: DIY cut T-shirts ideas, T-shirt cutting ideas, no-sew T-shirt makeover, old T-shirt transformation, DIY cropped T-shirt, upcycled T-shirt ideas, easy T-shirt refashion
10 DIY Cut T-Shirts Ideas That Make Old Tees Look Stylish Again
Do you have old T-shirts sitting at the back of your wardrobe because they feel too plain, oversized, or outdated?
Before you throw them away, consider giving them a creative makeover. With a good pair of fabric scissors and a few simple cutting techniques, an ordinary shirt can become a cropped top, workout tank, festival outfit, off-shoulder tee, or statement piece.
The best part is that many DIY cut T-shirts ideas require no sewing machine, expensive tools, or advanced fashion-design skills. Most can be completed in less than 30 minutes using a shirt you already own.
T-shirt cutting is also a practical form of upcycling. Instead of buying another trendy top, you can refresh an unused garment and create something that reflects your personal style.
This guide covers 10 easy and attractive T-shirt transformations. For every idea, you will find:
- A clear description of the finished design
- Who the style suits best
- Step-by-step cutting guidance
- Styling suggestions
- Practical benefits
- Approximate completion time
- Maintenance advice
Whether you prefer sporty, feminine, edgy, casual, or festival-inspired outfits, these creative T-shirt cutting ideas will help you build a more interesting wardrobe without spending much money.
What Are DIY Cut T-Shirts?
DIY cut T-shirts are ordinary tees that have been altered with scissors to create a different shape, neckline, sleeve style, hem, or decorative cutout.
Popular transformations include:
- Cropped hems
- Fringe details
- Open-back patterns
- Off-shoulder necklines
- Tank tops
- Side knots
- Braided backs
- Decorative cutouts
Most projects fall under the category of no-sew T-shirt refashioning, although a few designs can be strengthened with basic hand stitching or fabric glue.
Cotton and cotton-blend shirts usually work best because the material is comfortable, easy to cut, and less likely to unravel severely. However, every fabric behaves differently, so testing a small hidden area before making major cuts is always a good idea.
Supplies You Need for T-Shirt Cutting
You do not need a professional sewing studio to try these projects. Gather the following basic supplies before starting:
- A clean T-shirt
- Sharp fabric scissors
- Tailor’s chalk or a washable fabric marker
- Measuring tape or ruler
- A flat cutting surface
- Pins or fabric clips
- A well-fitting shirt to use as a size guide
- Cardboard to place inside the shirt
- Optional needle and thread
- Optional fabric glue
- Optional beads, studs, safety pins, or decorative trims
Why Fabric Scissors Matter
Regular household scissors may create uneven, jagged cuts, especially on soft or stretchy fabric. Fabric scissors produce cleaner lines and give you better control.
Avoid using fabric scissors on paper because paper can quickly dull the blades.
Quick Comparison of the 10 DIY T-Shirt Ideas
| DIY T-Shirt Design | Estimated Time | Difficulty | Sewing Required | Maintenance Level | Best Style |
|---|---|---|---|---|---|
| Classic Cropped T-Shirt | 10–15 minutes | Easy | No | Low | Casual and sporty |
| Side-Knot Crop Top | 15–20 minutes | Easy | No | Low | Feminine and relaxed |
| Fringe-Hem T-Shirt | 20–30 minutes | Easy | No | Medium | Festival and bohemian |
| Off-Shoulder T-Shirt | 15–25 minutes | Easy | No | Low | Soft and feminine |
| Cold-Shoulder T-Shirt | 20–30 minutes | Intermediate | Optional | Medium | Trendy and modern |
| Lattice-Back T-Shirt | 30–45 minutes | Intermediate | No | Medium | Edgy and creative |
| Heart Cutout T-Shirt | 25–40 minutes | Intermediate | Optional | Medium | Romantic and playful |
| Braided Racerback T-Shirt | 30–45 minutes | Intermediate | Optional | Medium | Sporty and stylish |
| DIY Muscle Tank | 10–20 minutes | Easy | No | Low | Gym and streetwear |
| Tie-Front V-Neck T-Shirt | 20–30 minutes | Intermediate | No | Medium | Chic and flattering |
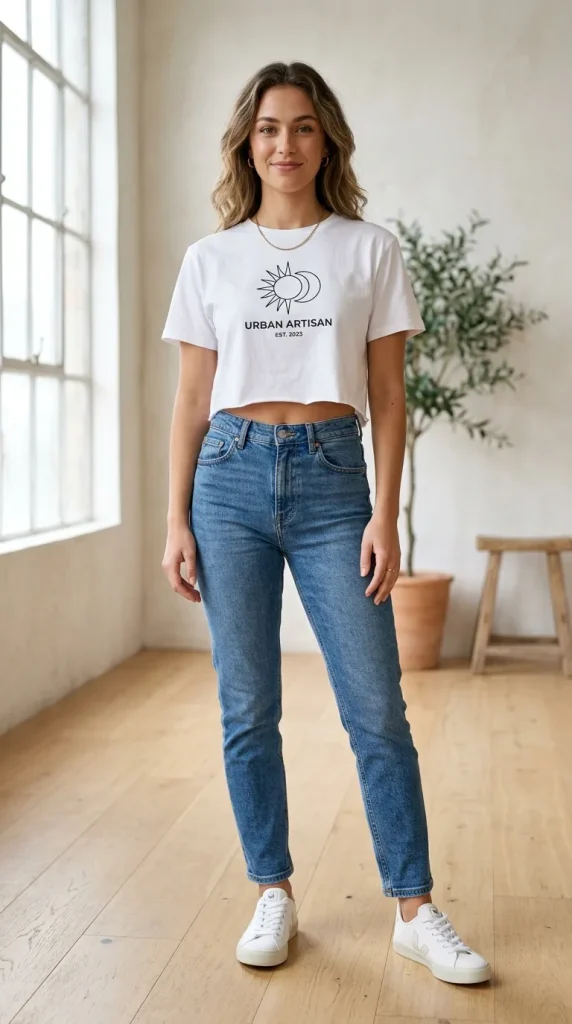
1. Classic DIY Cropped T-Shirt
A classic cropped tee is one of the easiest and most versatile transformations. It works especially well with oversized shirts, old graphic tees, band shirts, and plain cotton tops.
The finished hem may sit at the waist, just above the waistband, or higher depending on the amount of coverage you prefer.
Who It Suits Best
This design is ideal for:
- Beginners trying T-shirt cutting for the first time
- People who enjoy casual or sporty outfits
- Anyone who wants to balance high-waisted bottoms
- Those with oversized shirts that feel shapeless
- Fans of relaxed streetwear
A crop top does not need to expose the stomach. A waist-length crop paired with high-rise jeans can provide full coverage while creating a more defined silhouette.
How to Make It
- Put on the shirt and decide where you want the new hem to fall.
- Mark the desired point at the front center.
- Remove the shirt and lay it flat.
- Measure evenly across the shirt.
- Draw a straight or slightly curved cutting line.
- Cut slowly through both layers.
- Gently stretch the new hem to encourage the jersey fabric to roll inward.
For a softer shape, make the front slightly shorter than the back.
Styling Tips
Pair a cropped graphic tee with high-waisted jeans and sneakers for an effortless everyday outfit. For a sporty look, wear it with leggings, joggers, or cycling shorts.
You can also layer it over a fitted tank top, bodysuit, or long-sleeved shirt.
Benefits
- Fast and beginner-friendly
- Creates a more flattering proportion
- Refreshes oversized shirts
- Requires no sewing
- Works with many outfit styles
- Makes high-waisted bottoms easier to showcase
2. Side-Knot Cropped T-Shirt
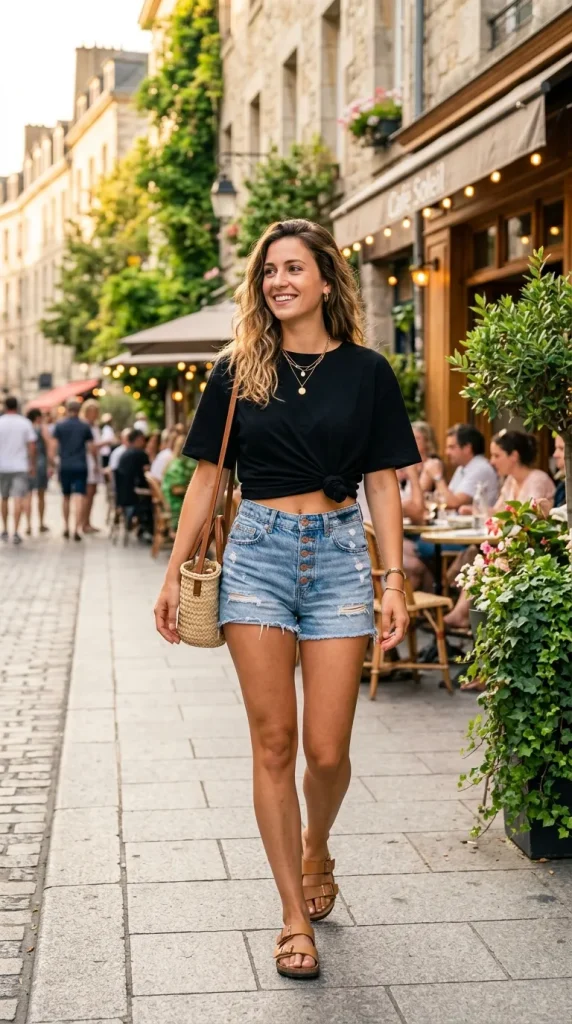
The side-knot design adds shape to a loose T-shirt without making the entire top extremely short. Instead of cutting straight across, you create two fabric tails that can be tied at one side.
This is one of the most wearable DIY cut T-shirts ideas because the knot can be loosened or tightened according to your preferred fit.
Who It Suits Best
The side-knot crop is a strong choice for:
- People who like adjustable clothing
- Anyone wanting to define the waist
- Beach, holiday, and summer outfits
- Oversized or boxy T-shirts
- Casual feminine styling
It is also useful when one side of a shirt has a stain or damaged hem because the altered area can be removed or hidden inside the knot.
How to Make It
- Put on the T-shirt and mark your preferred front length.
- Lay the shirt on a flat surface.
- Cut the back hem straight across at the marked length.
- On the front, leave two narrow triangular tails near one side seam.
- Cut away the remaining front hem around the tails.
- Tie the two tails together in a secure knot.
- Adjust the knot until the shirt sits comfortably.
Do not make the ties too thin, or they may stretch and weaken after repeated use.
Styling Tips
Wear the side-knot top with a denim skirt, high-waisted shorts, wide-leg trousers, or fitted jeans. Add sandals for a relaxed summer appearance or white sneakers for a casual daytime outfit.
A small side knot usually looks more polished than a bulky central knot.
Benefits
- Adjustable length and fit
- Defines the waist
- Adds visual interest
- Works well with oversized tees
- Can hide an uneven or damaged hem
- Requires no advanced sewing skills
3. DIY Fringe-Hem T-Shirt
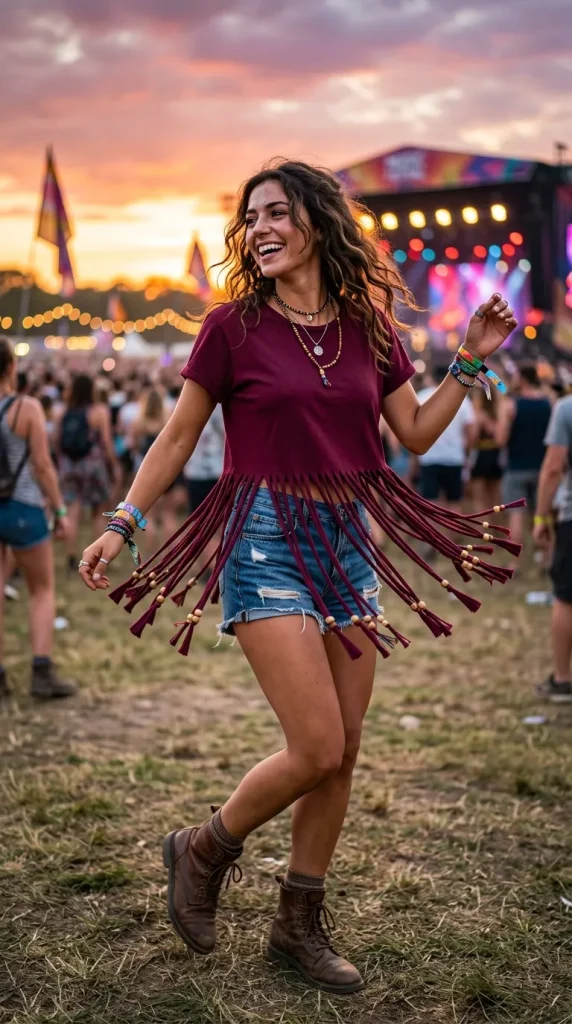
A fringe-hem tee has narrow strips cut vertically into the lower section of the shirt. The fringe can remain loose, be knotted, decorated with beads, or arranged in a macramé-inspired pattern.
This design creates movement and works particularly well for concerts, festivals, beachwear, dance events, and summer gatherings.
Who It Suits Best
A fringe T-shirt is suitable for:
- Festival and concert outfits
- Bohemian fashion lovers
- Dance or performance clothing
- Beach and holiday styling
- Anyone who wants a playful statement top
Longer shirts work best because you need enough material to create fringe without making the finished top too short.
How to Make It
- Put on the shirt and mark where the fringe should begin.
- Remove the shirt and lay it completely flat.
- Draw a horizontal guideline across the front and back.
- Decide how wide each fringe strip should be.
- Cut vertical strips from the bottom hem to the guideline.
- Cut off the original stitched hem if you want a softer finish.
- Pull each strip gently so the fabric rolls into a cord-like shape.
- Leave the strands loose or tie small knots at the ends.
For an upgraded design, thread large wooden or acrylic beads onto selected strands and secure them with knots.
Styling Tips
Let the fringe be the main feature by pairing the top with simple denim shorts, fitted trousers, or a plain skirt.
Avoid wearing heavily decorated bottoms because too many competing details can make the outfit appear cluttered.
Benefits
- Adds texture and movement
- Highly customizable
- Excellent for festivals and concerts
- Can include beads or knots
- Turns a plain tee into a statement piece
- Requires little more than careful cutting
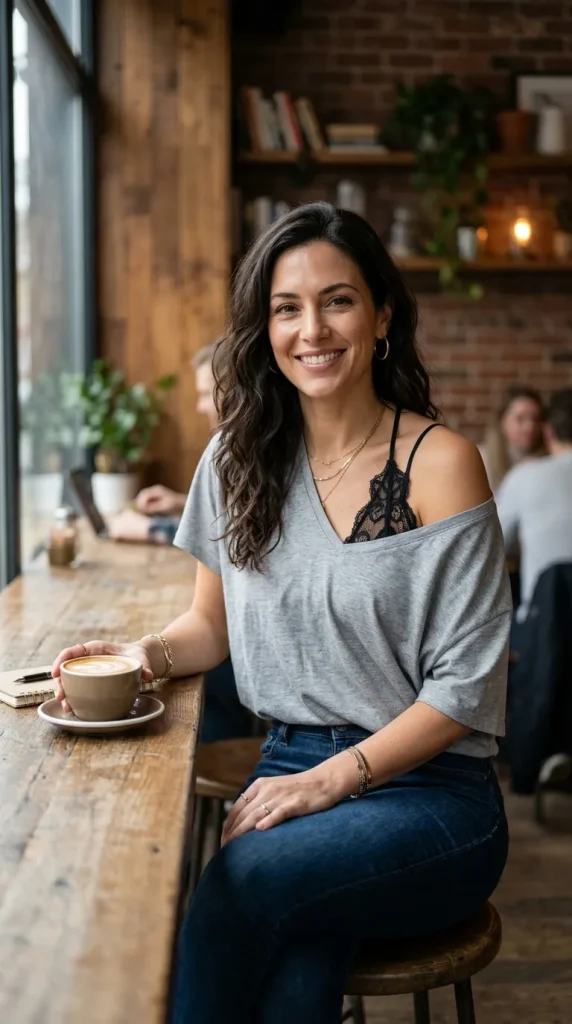
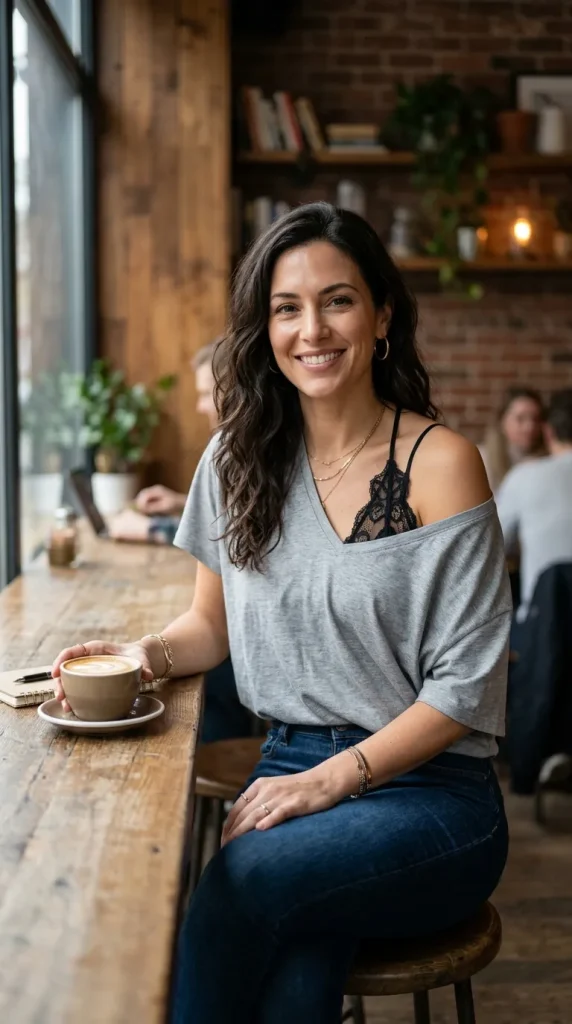
4. Easy Off-Shoulder T-Shirt
An off-shoulder T-shirt has a widened neckline that sits below one or both shoulders. It creates a relaxed, feminine silhouette while preserving most of the original shirt.
The key is to enlarge the neckline gradually. Cutting too much fabric at once may cause the shirt to slip too low.
Who It Suits Best
This style is especially flattering for:
- People who prefer soft, feminine outfits
- Casual date-night looks
- Brunch and weekend styling
- Layered outfits with visible straps
- Oversized crew-neck shirts
The look can be worn symmetrically across both shoulders or pulled slightly to one side.
How to Make It
- Lay the shirt flat and smooth the neckline.
- Mark a line about two to three centimetres outside the existing collar.
- Begin cutting near one shoulder seam.
- Follow the front neckline in a shallow curve.
- Continue carefully around the back.
- Remove the original ribbed collar.
- Try on the shirt before widening the opening further.
- Stretch the cut edge gently for a natural rolled finish.
Cut conservatively at first. You can always remove more material, but you cannot restore fabric after it has been cut.
Styling Tips
Wear the top over a lace bralette, fitted camisole, or sports bra with attractive straps. Pair it with jeans and ankle boots for a relaxed evening look.
Tuck one side into high-waisted trousers to add definition and prevent the shirt from looking overly loose.
Benefits
- Creates an elegant neckline
- Keeps most of the shirt intact
- Works well for layering
- Softens oversized tees
- Can be completed without sewing
- Easily adjusted to expose one or both shoulders
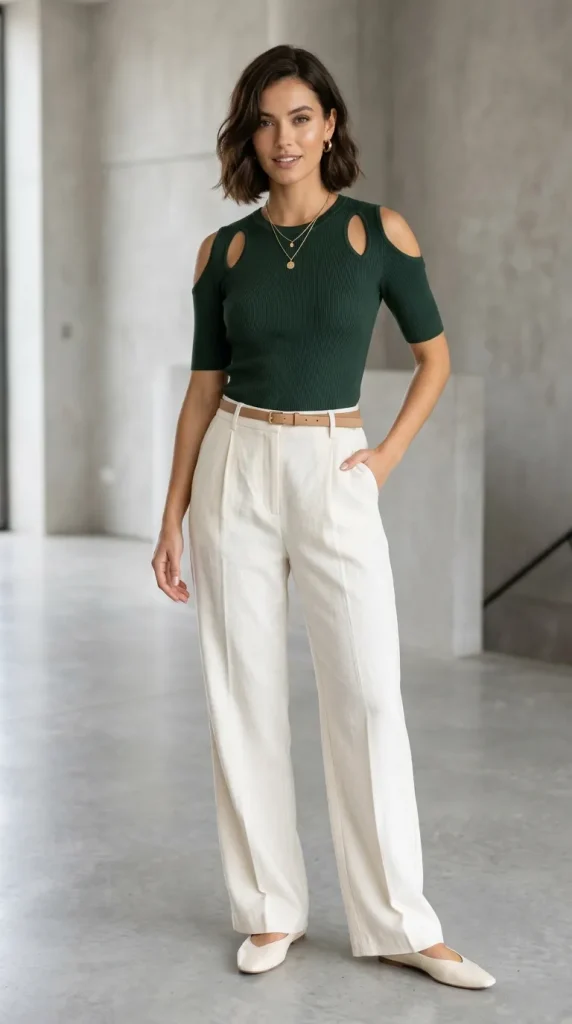
5. Cold-Shoulder Cutout T-Shirt
The cold-shoulder design features openings over the shoulders while keeping the neckline and lower sleeves attached. It provides a more structured alternative to a full off-shoulder top.
This style works best when both shoulder cutouts are measured carefully and positioned symmetrically.
Who It Suits Best
Choose this design when you want:
- A fashionable but wearable cutout top
- More coverage than an off-shoulder shirt
- A modern casual outfit
- A balanced look for jeans or skirts
- A creative update for fitted or semi-fitted tees
It can also work well on long-sleeved shirts, especially when you want to create a transitional-season top.
How to Make It
- Put on the shirt and identify where the shoulder openings should sit.
- Mark the beginning and end of each opening.
- Lay the shirt flat and check that both sides match.
- Draw an oval, teardrop, or narrow curved shape over each shoulder.
- Place cardboard inside the shirt to protect the back layer.
- Cut one fabric layer at a time.
- Try the top on and refine the openings if necessary.
- Add a few hand stitches around weak seam points if the fabric feels unstable.
Avoid cutting directly through the main shoulder seam unless you plan to reinforce it.
Styling Tips
Pair the top with slim jeans, tailored shorts, or a midi skirt. Since the shoulders already create a focal point, keep necklaces and accessories relatively simple.
A sleek ponytail or bun can help showcase the cutout detail.
Benefits
- Stylish without being overly revealing
- Preserves the original neckline
- Suitable for several seasons
- Works with short or long sleeves
- Provides a structured cutout effect
- Easy to customize with different opening shapes
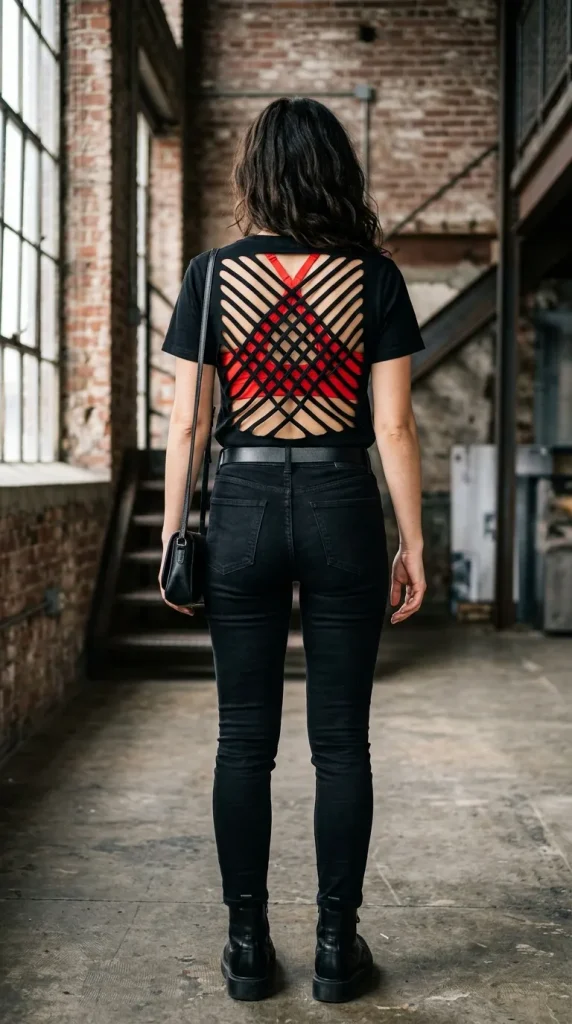
6. Lattice-Back T-Shirt
A lattice-back T-shirt has a series of horizontal cuts across the back. The fabric strips may be stretched, twisted, woven, or tied to produce an open patterned effect.
This is one of the most impressive no-sew T-shirt makeover ideas, although it requires patience and accurate spacing.
Who It Suits Best
The lattice-back design works well for:
- Edgy street-style outfits
- Concert and festival clothing
- Layering over sports bras or camisoles
- Creative fashion lovers
- Plain shirts that need a dramatic focal point
Choose a shirt with a relatively simple front so the back design receives proper attention.
How to Make It
- Place cardboard inside the shirt.
- Turn the shirt so the back faces upward.
- Draw a vertical centre guideline.
- Mark several evenly spaced horizontal lines.
- Make each line shorter than the one below it for a tapered pattern.
- Cut through the back layer only.
- Gently stretch each strip.
- Leave the strips open, twist them, or weave adjacent strips together.
For a woven pattern, pull one strip under the next and continue in a consistent sequence.
Styling Tips
Layer the lattice-back tee over a contrasting sports bra, bandeau, fitted tank, or lace camisole. The underlayer should complement the cutout rather than distract from it.
Keep the front of the outfit simple and consider wearing your hair up so the design remains visible.
Benefits
- Creates a dramatic back detail
- Does not require a sewing machine
- Offers many pattern variations
- Makes plain shirts look more expensive
- Ideal for layering
- Provides ventilation in warm weather
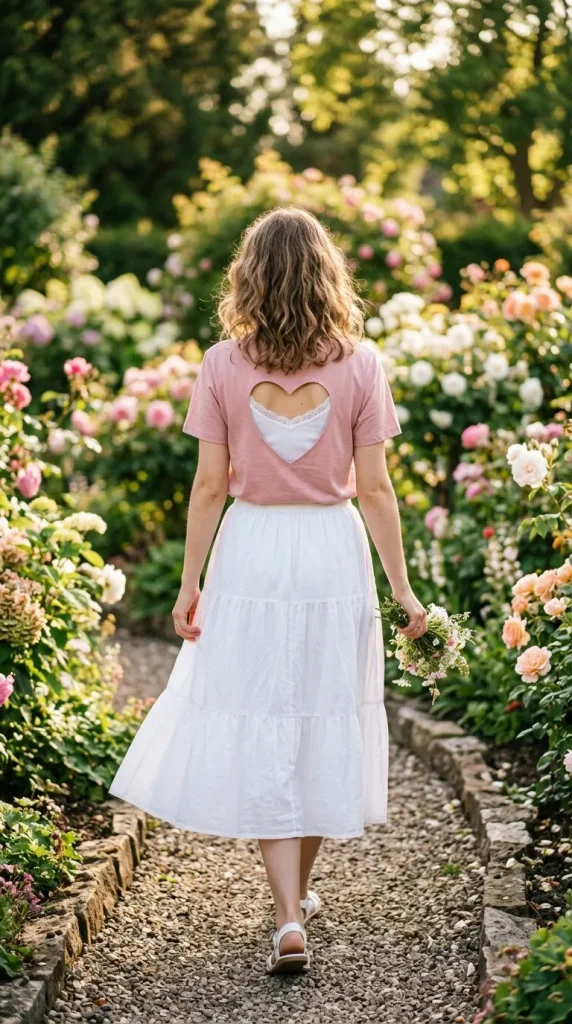
7. Heart Cutout Back T-Shirt
A heart-shaped cutout gives a plain T-shirt a romantic and playful update. The heart can be placed at the upper back, centre back, or near one shoulder.
Because curved shapes are harder to cut than straight lines, careful marking is essential.
Who It Suits Best
This design is a lovely option for:
- Romantic or feminine wardrobes
- Valentine’s Day outfits
- Concert and party looks
- Customized gifts
- Teen and young-adult fashion
- Anyone who enjoys decorative cutouts
A medium-sized heart is usually easier to maintain than a very large opening.
How to Make It
- Turn the shirt inside out.
- Insert cardboard between the front and back.
- Create a paper heart template.
- Position the template on the back of the shirt.
- Trace around it using tailor’s chalk.
- Fold the back fabric vertically through the middle of the heart.
- Cut along half the traced shape.
- Unfold the fabric and inspect the symmetry.
- Trim small uneven areas carefully.
For added structure, create several horizontal cuts inside the heart instead of removing the entire shape. This forms a striped heart pattern and keeps more fabric intact.
Styling Tips
Wear a contrasting camisole, bralette, or bandeau underneath to make the heart shape stand out. A red, pink, white, or black underlayer can create a strong visual effect.
The design pairs naturally with jeans, skirts, and simple sneakers.
Benefits
- Creates a recognizable decorative feature
- Makes a thoughtful handmade gift
- Can be subtle or bold
- Works with contrasting layers
- Personalizes plain T-shirts
- Offers full-cutout and striped-cutout variations
8. Braided Racerback T-Shirt
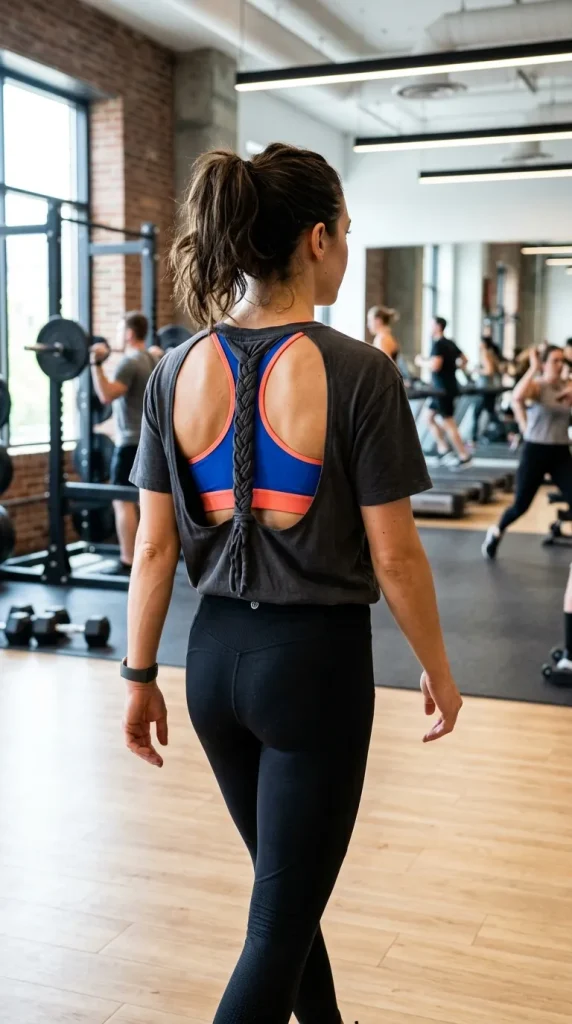
A braided racerback top combines the shape of a workout tank with a decorative braided section down the upper back. It is sporty, breathable, and more detailed than a basic sleeveless shirt.
The braid can be secured with hand stitches, a fabric tie, or a small piece of material cut from the shirt.
Who It Suits Best
This transformation is ideal for:
- Gym and yoga outfits
- Dance practice
- Summer activewear
- Sporty street style
- Layering over attractive sports bras
- Oversized shirts with wide sleeves
Soft cotton shirts with some stretch are usually easiest to manipulate into the braided shape.
How to Make It
- Cut off both sleeves, following the armhole seams.
- Deepen the armholes gradually.
- Remove or widen the neckline if desired.
- Turn the shirt over.
- Gather the back shoulder sections toward the centre.
- Cut a long narrow strip from one discarded sleeve.
- Wrap the strip around the gathered fabric.
- Continue wrapping downward to form a braided or twisted racerback appearance.
- Tie the strip securely or add a few hand stitches.
Do not deepen the armholes too quickly. Try on the shirt several times to check coverage.
Styling Tips
Wear the finished top over a fitted sports bra in a complementary or contrasting shade. Pair it with leggings, joggers, gym shorts, or distressed denim.
The shirt can also work as a swimsuit cover-up for casual beach days.
Benefits
- Breathable and workout-friendly
- Reuses fabric removed from the sleeves
- Creates a decorative back
- Works well with oversized tees
- Supports layering
- Combines fashion with practical movement
9. No-Sew DIY Muscle Tank
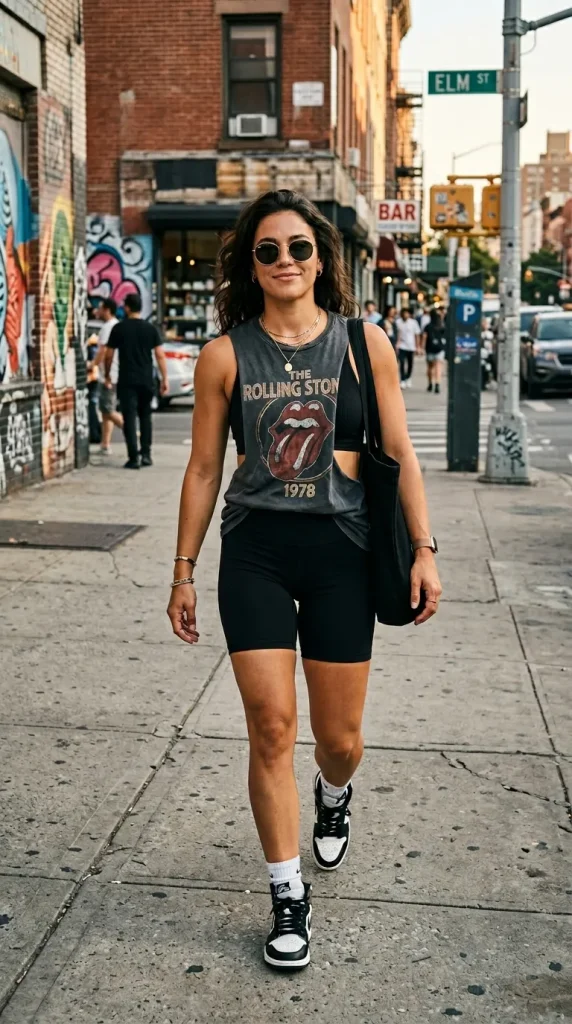
A muscle tank is created by removing the sleeves and enlarging the armholes. It has a relaxed, sporty look and can be worn for workouts, casual outings, or layered streetwear outfits.
This is one of the fastest T-shirt transformations and requires very little measuring.
Who It Suits Best
A DIY muscle tank is perfect for:
- Gym and fitness clothing
- Hot-weather outfits
- Relaxed streetwear
- Fans of oversized band shirts
- Beginner DIY projects
- Layering over sports bras or fitted tanks
Both fitted and oversized shirts can work, but oversized graphic tees often produce the most relaxed result.
How to Make It
- Lay the shirt flat.
- Cut just inside or outside each sleeve seam.
- Follow the natural curve of the armhole.
- Try the shirt on.
- Deepen the armholes in small increments if needed.
- Remove the collar for a wider neckline if desired.
- Crop the hem or leave it full length.
- Stretch the raw edges gently for a rolled finish.
To keep both armholes symmetrical, cut the first sleeve, fold the shirt in half, and use the finished side as a guide for the second.
Styling Tips
Combine a graphic muscle tank with black leggings, biker shorts, ripped jeans, or cargo trousers. Wear a bright sports bra underneath if you want the side openings to become part of the outfit.
For a cleaner appearance, keep the armholes relatively shallow.
Benefits
- Takes very little time
- Excellent for warm weather
- Supports freedom of movement
- Works for gym and casual wear
- Requires no sewing
- Revives old graphic tees effectively
10. Tie-Front V-Neck T-Shirt
The tie-front V-neck design transforms a plain T-shirt into a more fitted, feminine top. The neckline is reshaped into a V, while the lower front is divided into two fabric ties.
It looks especially attractive with high-waisted jeans, skirts, and shorts.
Who It Suits Best
This style suits:
- Feminine casual outfits
- Summer wardrobes
- Beach and holiday clothing
- People who prefer adjustable waist definition
- Loose or oversized T-shirts
- Brunch, shopping, and daytime looks
The front ties make it possible to adjust the shirt’s length and tightness.
How to Make It
- Mark the desired depth of the V-neck.
- Cut from one side of the collar toward the marked centre point.
- Repeat on the other side.
- Remove the front portion of the original collar.
- Decide where the new hem should sit.
- Cut the back straight across.
- Leave two wide triangular fabric panels at the centre front.
- Remove the surrounding excess fabric.
- Tie the front panels into a knot or bow.
- Adjust the neckline and knot for comfort.
Keep the V-neck shallow during the first cut. It can always be deepened after trying on the shirt.
Styling Tips
Pair the top with high-waisted trousers, a flowing midi skirt, denim shorts, or layered necklaces. For additional coverage, wear a fitted camisole underneath.
A neat front knot looks polished, while a loose bow creates a softer appearance.
Benefits
- Defines the waist
- Creates an adjustable fit
- Combines two transformations in one design
- Adds a more feminine neckline
- Works well with high-waisted bottoms
- Makes oversized shirts feel intentional
How to Choose the Right T-Shirt for Cutting
The quality of the finished project depends heavily on the shirt you choose.
Consider the Fabric
Cotton jersey is generally the easiest material for beginners. It is soft, flexible, and often rolls neatly at raw edges.
Very thin fabric may stretch out of shape, while thick fabric can be harder to knot or braid.
Check the Existing Fit
A shirt that already fits tightly may become uncomfortable after major cutouts. Oversized and relaxed-fit tees offer more room for experimentation.
Before cutting, decide whether you want the final result to remain loose, become fitted, or be worn over another layer.
Examine the Graphic Placement
When working with a printed shirt, check where the design sits. A high crop may cut through text or artwork.
Mark the new hem while wearing the shirt so you can preserve important design elements.
Inspect for Damage
Small stains, holes, and damaged seams do not always mean a shirt is unusable. A strategic cutout, crop, knot, or fringe can remove or disguise the problem.
However, avoid cutting through severely weakened fabric because it may tear further during washing.
Pro Tips for Professional-Looking Results
Wash the Shirt Before Cutting
New cotton shirts may shrink during the first wash. Washing and drying the garment before altering it reduces the risk of the final shape becoming shorter or tighter later.
Mark While Wearing the Shirt
The fabric hangs differently on the body than it does on a table. Marking important points while wearing the shirt helps you choose a more accurate neckline, hem, and cutout position.
Cut Less Than You Think You Need
Start conservatively. Remove small amounts of fabric, try the shirt on, and continue only when necessary.
This is particularly important for necklines, armholes, and cropped hems.
Use a Template for Decorative Shapes
Hearts, stars, moons, wings, and geometric cutouts look cleaner when traced from a paper template.
Fold symmetrical shapes in half before cutting to improve balance.
Protect the Opposite Fabric Layer
Place cardboard inside the shirt whenever you are cutting only the front or back. This prevents accidental cuts through both layers.
Stretch Raw Jersey Edges Carefully
A gentle pull encourages cotton jersey to roll inward and creates a softer finish. Do not overstretch thin material because it may become wavy or distorted.
Reinforce High-Stress Areas
The ends of cutouts may tear if they sit near seams or areas that experience tension. A few small hand stitches or a dot of flexible fabric glue can strengthen these points.
Practice on an Unwanted Shirt
Before modifying a valuable band tee or sentimental shirt, test the technique on a garment you no longer wear.
Practising helps you understand how the fabric stretches and responds to cutting.
Common T-Shirt Cutting Mistakes to Avoid
Cutting the Shirt While Holding It
Always work on a stable, flat surface. Cutting while the shirt is hanging or being held can produce uneven lines and accidental holes.
Using Blunt Scissors
Dull blades pull and chew the fabric instead of cutting it cleanly. This creates jagged edges that are difficult to correct.
Forgetting to Check Both Layers
Before cutting, smooth the shirt and check that the side seams align. Unnoticed folds can make the front and back uneven.
Making the Crop Too Short
Remember that raw cotton edges may roll upward after stretching and washing. Leave a little extra length during the first cut.
Cutting Both Layers During a Back Design
Decorative back cutouts should usually affect only the back panel. Insert cardboard and lift the top fabric layer before cutting.
Ignoring Seam Strength
Cutting directly through major shoulder or side seams can weaken the entire structure of the garment. Reinforce altered seams when necessary.
Making Fringe Strips Uneven
Use a ruler or measuring tape to keep fringe strips consistent. Uneven fringe can look accidental rather than artistic.
Choosing the Wrong Shirt Size
A fitted shirt offers less room for mistakes. Beginners may find it easier to work with a relaxed or oversized tee.
Skipping the Try-On Stage
Try the shirt on several times throughout the project. Frequent fit checks prevent necklines, cutouts, and armholes from becoming too large.
How to Wash and Maintain Cut T-Shirts
Proper care helps a DIY T-shirt retain its shape.
For best results:
- Turn the shirt inside out.
- Place detailed designs inside a mesh laundry bag.
- Wash with cold or lukewarm water.
- Use a gentle cycle.
- Avoid harsh bleach.
- Air-dry intricate cutout or braided designs.
- Untangle fringe before drying.
- Reshape stretched openings while the shirt is damp.
Simple cropped tees and muscle tanks are usually easy to maintain. Lattice backs, fringe hems, braids, and decorative cutouts need gentler handling.
Creative Ways to Personalize Your DIY T-Shirt
Cutting can be combined with other customization techniques to produce a completely original garment.
Consider adding:
- Fabric paint
- Tie-dye patterns
- Iron-on patches
- Embroidery
- Studs
- Pearls
- Rhinestones
- Safety pins
- Fabric markers
- Lace panels
- Beads
- Chains
- Contrast stitching
Keep the design balanced. When the shirt already has a dramatic cutout or fringe pattern, a small number of additional decorations is usually more effective than covering every area.
Frequently Asked Questions
What is the easiest T-shirt cutting idea for beginners?
A classic cropped T-shirt or sleeveless muscle tank is usually the easiest starting point. Both require only a few simple cuts and can be completed in approximately 10 to 20 minutes.
Do cut T-shirts need to be sewn?
Many DIY cut T-shirts do not require sewing because cotton jersey generally does not fray like woven fabric. However, small stitches can strengthen cutouts, altered seams, braids, and other high-stress areas.
How can I cut a T-shirt evenly?
Lay the shirt on a flat surface, align the side seams, smooth out wrinkles, and mark the cutting line with a ruler and tailor’s chalk. Cut slowly with sharp fabric scissors rather than trying to complete the entire cut in one fast motion.
What type of T-shirt works best for DIY cutting?
Cotton and cotton-blend jersey shirts are usually the easiest to cut. Oversized or relaxed-fit tees provide more fabric for knots, fringe, braids, and cropped designs.
How do I stop a cut neckline from stretching too much?
Begin with a smaller opening and widen it gradually. Avoid pulling the neckline aggressively, wash the shirt on a gentle cycle, and air-dry it flat when possible. Small hand stitches near the shoulder seams can also reduce excessive stretching.
Final Thoughts
These 10 DIY cut T-shirts ideas prove that an old shirt does not need to remain forgotten in your wardrobe. A few carefully planned cuts can transform it into a crop top, festival tee, workout tank, off-shoulder blouse, or decorative statement piece.
Beginners should start with a classic crop top or muscle tank before attempting detailed lattice patterns, braided backs, and shaped cutouts. Measure carefully, use sharp fabric scissors, protect the opposite layer, and try the shirt on regularly throughout the process.
Most importantly, treat each project as an opportunity to experiment. The goal is not to reproduce a factory-made garment perfectly. It is to create a comfortable, wearable piece that reflects your personal taste.
Choose an old T-shirt today, select one design from this guide, and give your wardrobe a creative no-sew upgrade.
- A fashionable young woman wearing a newly transformed classic cropped white graphic T-shirt with a clean raw hem, styled with high-waisted blue jeans and white sneakers, modern minimalist studio background, soft natural window lighting, full-body front camera angle, realistic cotton texture, contemporary DIY fashion editorial, high quality, ultra realistic, 4k, sharp focus.
- A stylish woman wearing an oversized black T-shirt transformed into a side-knot crop top, neat adjustable knot positioned at the lower left waist, paired with high-waisted denim shorts and casual sandals, bright summer street background with subtle greenery, warm golden-hour lighting, three-quarter camera angle, professional lifestyle photography, high quality, ultra realistic, 4k, sharp focus.
- A creative festival outfit featuring a woman in a burgundy DIY fringe-hem T-shirt with long evenly cut tassels, selected strands decorated with small wooden beads, paired with denim shorts and ankle boots, lively outdoor music-festival background with soft bokeh lights, cinematic sunset lighting, low three-quarter camera angle, dynamic fabric movement, high quality, ultra realistic, 4k, sharp focus.
- An elegant woman wearing a soft grey oversized T-shirt redesigned with a wide off-shoulder neckline, one shoulder gently exposed, layered over a delicate black lace bralette, paired with fitted dark jeans, chic urban café background, diffused morning light, waist-up editorial camera angle, refined casual styling, realistic fabric folds, high quality, ultra realistic, 4k, sharp focus.
- A fashionable model wearing a fitted dark green T-shirt with symmetrical oval cold-shoulder cutouts, preserved neckline and short sleeves, styled with tailored cream trousers and minimal jewellery, polished modern studio background, soft directional beauty lighting, front three-quarter camera angle, premium fashion-catalogue composition, high quality, ultra realistic, 4k, sharp focus.
- Back view of a stylish woman wearing a black DIY lattice-back T-shirt with evenly spaced horizontal cut strips woven into an intricate open pattern, bright red sports bra visible underneath, paired with black jeans, industrial loft background with textured brick walls, dramatic side lighting, shoulder-level rear camera angle, edgy street-fashion editorial, high quality, ultra realistic, 4k, sharp focus.
- Back view of a young woman wearing a soft pink T-shirt featuring a precise heart-shaped cutout at the centre back, white camisole visible beneath the heart design, paired with a flowing white skirt, romantic garden background with blurred flowers, gentle golden sunlight, slightly elevated rear camera angle, feminine lifestyle photography, high quality, ultra realistic, 4k, sharp focus.
- Athletic woman wearing a charcoal DIY braided racerback T-shirt made from an oversized tee, decorative wrapped braid running down the upper back, vibrant sports bra underneath, paired with fitted workout leggings, bright contemporary fitness studio background, crisp natural and overhead lighting, rear three-quarter camera angle, realistic activewear photography, high quality, ultra realistic, 4k, sharp focus.
- Confident woman wearing an oversized vintage band T-shirt transformed into a sleeveless muscle tank with deep but balanced armholes, layered over a fitted sports bra and paired with black biker shorts, urban concrete street background, bold late-afternoon lighting, slightly low front camera angle, relaxed streetwear campaign aesthetic, high quality, ultra realistic, 4k, sharp focus.
- Stylish woman wearing a white T-shirt redesigned with a flattering V-neck and two wide fabric panels tied neatly at the centre front, paired with a high-waisted floral midi skirt and delicate layered necklaces, bright Mediterranean-inspired outdoor background, warm soft daylight, eye-level three-quarter camera angle, sophisticated summer fashion editorial, high quality, ultra realistic, 4k, sharp focus.


Leave a Reply